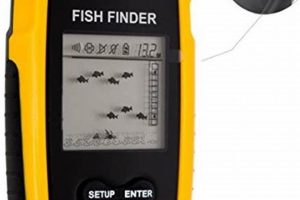
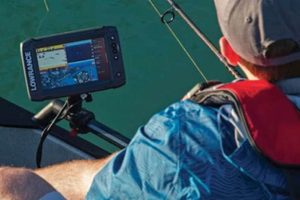
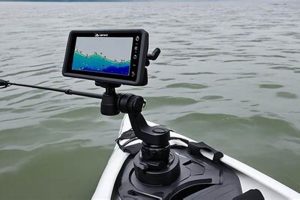
Equipping a kayak with a sonar device involves several key steps to ensure optimal performance and minimal interference with paddling. This typically includes mounting the transducer, routing cables, and securing the display unit within easy reach. A common approach involves using a Scotty mount or similar system for the transducer arm and utilizing adhesive mounts or RAM systems for the display head. Power is typically supplied by a 12-volt battery secured in a dry bag or dedicated battery box.
Locating fish accurately and efficiently enhances the angling experience from a kayak. Understanding underwater terrain features, such as drop-offs, vegetation, and depth variations, becomes significantly easier with these devices, leading to more strategic fishing. This technology has evolved considerably, from basic flashing-light depth finders to sophisticated systems with GPS, chartplotting, and side-imaging capabilities, empowering anglers with detailed underwater insights. This increased awareness not only improves fishing success but also promotes safer navigation, especially in unfamiliar waters.
The following sections will detail the necessary equipment, installation procedures, power management strategies, and various mounting options for achieving a clean and functional electronics setup on a kayak. Specific considerations for different kayak types and transducer choices will also be addressed to provide a comprehensive guide for equipping any kayak with sonar technology.
Tips for Fish Finder Installation on a Kayak
Careful planning and execution are crucial for a successful fish finder installation. These tips offer guidance for a streamlined and effective process.
Tip 1: Choose the Right Location for the Transducer: Placement significantly impacts performance. Avoid areas of turbulence or near through-hull fittings. Inside-hull mounting, while convenient, can slightly reduce sensitivity. Consider a transducer scupper mount for kayaks equipped with scupper holes.
Tip 2: Secure All Wiring: Loose cables can interfere with paddling and create tripping hazards. Use zip ties or adhesive clips to route wires neatly along the kayak, ensuring they are protected from abrasion and exposure to elements.
Tip 3: Waterproofing is Paramount: All connections and exposed wires should be thoroughly waterproofed using marine-grade sealant or heat shrink tubing. This prevents corrosion and ensures reliable operation in wet conditions.
Tip 4: Select a Suitable Power Source: A dedicated 12-volt battery offers consistent performance and avoids draining the kayak’s primary power source if one exists. Secure the battery in a waterproof container or battery box.
Tip 5: Consider Cable Management Accessories: Cable organizers and grommets maintain a clean setup and minimize clutter, enhancing both aesthetics and practicality on the kayak.
Tip 6: Test the System Before Your Trip: Verify all connections and functionality before heading out on the water. This allows for troubleshooting any issues in a controlled environment.
Tip 7: Research Kayak-Specific Mounting Solutions: Different kayak designs may benefit from specialized mounting hardware. Explore options like track systems or flexible mounts for optimal placement and stability.
Following these guidelines ensures a reliable and functional fish finder setup, enhancing angling experiences and contributing to safe navigation on the water. Proper installation maximizes the benefits of this technology and minimizes potential issues during use.
By addressing these crucial installation aspects, anglers can confidently utilize their fish finders, making informed decisions on the water and maximizing their fishing success.
1. Transducer Placement
Transducer placement is a critical aspect of fish finder installation on a kayak. Optimal performance relies heavily on minimizing interference and maximizing sonar signal clarity. Incorrect placement can lead to inaccurate readings, reduced sensitivity, and potential damage to the transducer. Several factors influence ideal placement, including kayak hull type, presence of through-hull fittings, and desired fishing style. For example, on a sit-on-top kayak, a transducer scupper mount offers convenience and avoids drilling holes, but potential turbulence near scupper holes must be considered. Inside-hull mounting provides a protected installation but may slightly reduce sensitivity. For trolling motor setups, positioning the transducer near the motor’s lower unit, but not directly in its path, is essential to avoid interference.
Practical considerations often dictate the best approach. On inflatable kayaks, mounting options might include a flexible arm attached to the side or a specialized inflatable transducer mount. Kayaks with existing track systems offer flexibility for adjusting transducer position. Regardless of the chosen method, ensuring a smooth, unobstructed surface for the transducer face is paramount. Proper orientation, usually parallel to the water’s surface, ensures accurate depth and bottom contour readings. Testing different locations and observing sonar readings can help determine the most effective placement for specific kayak configurations and fishing conditions. Careful consideration of these factors optimizes sonar performance and provides anglers with reliable underwater information.
In summary, successful transducer placement requires careful consideration of kayak design, potential interference sources, and desired fishing techniques. Understanding the principles of sonar operation and the impact of transducer placement allows anglers to maximize their fish finder’s effectiveness. Appropriate mounting hardware and diligent testing contribute significantly to a well-integrated and high-performing system. This attention to detail ensures accurate readings, enhances the angler’s understanding of underwater environments, and ultimately leads to a more productive and enjoyable fishing experience.
2. Wiring and Power
Reliable power delivery and clean wiring are fundamental to a successful fish finder installation on a kayak. A poorly executed electrical setup can lead to intermittent operation, inaccurate readings, and potential equipment damage. Understanding the power requirements of the fish finder and employing appropriate wiring practices ensures consistent performance and longevity.
- Power Source Selection
Choosing an appropriate power source depends on the fish finder’s power consumption and desired runtime. Common options include dedicated 12-volt marine batteries, which offer ample capacity and consistent output. Alternatively, smaller lithium-ion batteries can provide sufficient power for shorter trips and offer weight savings. Factors such as battery capacity (amp-hours), fish finder power draw, and anticipated usage duration should inform the decision-making process. A power source that cannot adequately supply the fish finder may result in reduced performance or system failure.
- Wiring Gauge and Type
Selecting the correct wire gauge prevents voltage drop and ensures efficient power delivery to the fish finder. Using a wire gauge that is too small can lead to overheating, reduced performance, and potential fire hazards. Marine-grade tinned copper wire is recommended for its corrosion resistance and durability in harsh marine environments. Consulting the fish finder manufacturer’s specifications provides guidance on the appropriate wire gauge for the specific unit.
- Cable Routing and Management
Careful cable routing minimizes interference with paddling and keeps the kayak deck clutter-free. Securing cables with zip ties or adhesive clips prevents snags and protects them from abrasion and UV exposure. Proper cable management not only contributes to a clean and organized setup but also reduces the risk of damage to the wiring and enhances overall safety.
- Connection and Waterproofing
All electrical connections should be secure and properly waterproofed to prevent corrosion and ensure reliable operation. Using marine-grade connectors and heat shrink tubing with adhesive lining provides a robust and watertight seal. Thorough waterproofing is essential to protect the electrical system from the elements and ensure long-term reliability.
These interconnected aspects of wiring and power directly impact the functionality and reliability of a kayak’s fish finder installation. Careful planning and execution of these elements ensure consistent performance, minimize potential problems, and contribute to a safe and enjoyable fishing experience. Neglecting any of these aspects can compromise the entire setup, leading to frustration and potentially jeopardizing safety on the water.
3. Display Mounting
Display mounting is integral to a functional and user-friendly fish finder setup on a kayak. Proper mounting ensures clear visibility, convenient access to controls, and minimal interference with paddling. Several factors influence mounting choices, including kayak type, display size, and angler preferences. A poorly mounted display can obstruct vision, create distractions, and compromise safety. Conversely, a well-mounted display enhances situational awareness and allows efficient operation of the fish finder, contributing to a more productive and enjoyable fishing experience. Cause and effect are directly linked; mounting choice impacts usability and safety. For example, mounting a large display on a small kayak with limited deck space can negatively impact stability and paddling efficiency. A smaller kayak may benefit from a RAM mount system offering flexibility and adjustability, while a larger, more stable kayak might accommodate a fixed mount.
Practical considerations dictate the optimal mounting solution. Anglers frequently standing might prefer a higher mount for better visibility, while those primarily seated benefit from a lower, more accessible position. Articulating mounts offer flexibility for adjusting viewing angles based on lighting conditions and paddling position. The mounting location should also consider cable routing to minimize clutter and potential entanglement. Real-life examples illustrate the importance of this understanding. A display mounted too close to the paddle stroke can lead to accidental strikes and equipment damage. A display mounted in direct sunlight may suffer from glare, reducing visibility and requiring constant adjustments. Addressing these factors during installation enhances the overall kayaking experience.
Effective display mounting requires careful consideration of kayak dimensions, angler usage patterns, and environmental factors. Prioritizing clear visibility, convenient access, and minimal interference optimizes the fish finder’s utility and contributes to a safer and more enjoyable kayaking experience. Challenges such as limited deck space, vibration, and exposure to the elements can be addressed through careful selection of mounting hardware and strategic placement. Understanding the interplay of these factors empowers anglers to create a customized setup that maximizes the benefits of their fish finder technology.
4. Kayak Compatibility
Kayak compatibility significantly influences fish finder installation choices and overall effectiveness. Kayak design, construction material, and available mounting points dictate suitable installation methods and equipment choices. Ignoring compatibility factors can lead to suboptimal performance, structural damage, and safety hazards. Understanding these factors is crucial for a successful and functional fish finder setup.
- Hull Type and Material
Hull type influences transducer mounting options and performance. Sit-on-top kayaks often accommodate through-hull or scupper hole mounting, while sit-inside kayaks may require inside-hull or transom mounting. Hull material affects transducer choice and installation method. For example, a plastic kayak hull allows for easier drilling and mounting than a composite hull. Incorrect transducer selection for a given hull material can lead to poor sonar readings or structural damage. Compatibility ensures optimal sonar performance and maintains hull integrity.
- Deck Space and Layout
Available deck space dictates display mounting options and cable routing strategies. Limited space necessitates compact displays and careful cable management to avoid clutter and interference with paddling. Kayaks with ample deck space provide more flexibility for larger displays and accessory mounting. For example, a smaller recreational kayak may require a compact display mounted on an adjustable arm, while a larger fishing kayak might accommodate a fixed mount for a larger screen. Careful consideration of deck space ensures a functional and ergonomic setup.
- Mounting Points and Accessories
Existing mounting points, such as tracks or inserts, simplify installation and offer flexibility for positioning accessories. Kayaks lacking dedicated mounting points may require drilling or adhesive mounts, which necessitate careful consideration of hull material and structural integrity. Utilizing compatible mounting systems ensures secure attachment of fish finder components and minimizes the risk of damage. For instance, a kayak with a track system allows for easy adjustment of display and transducer positions, while a kayak without tracks may require adhesive mounts or drilling. Choosing appropriate mounting solutions ensures stability and longevity.
- Stability and Weight Capacity
Kayak stability and weight capacity influence equipment choices and placement. Adding a fish finder, battery, and accessories affects the kayak’s center of gravity and overall stability. Exceeding the weight capacity can compromise performance and safety. Heavier fish finder setups necessitate a stable kayak platform to maintain balance and maneuverability. For example, adding a large battery and display to a lightweight, unstable kayak can negatively impact handling and increase the risk of capsizing. Matching equipment weight to the kayak’s capacity ensures safe and predictable performance on the water.
Understanding the interplay of these compatibility factors ensures a seamless integration of the fish finder system with the kayak platform. A compatible setup maximizes performance, minimizes potential issues, and contributes to a safe and enjoyable kayaking experience. Neglecting these considerations can compromise functionality, damage the kayak, and potentially create hazardous situations on the water. Careful assessment of these factors optimizes the benefits of the fish finder technology while maintaining the integrity and performance of the kayak.
5. System Testing
System testing forms a critical final stage in the process of equipping a kayak with a fish finder. Verification of proper function before deployment on the water prevents potential frustration and wasted fishing time. This crucial step confirms the integrity of all connections, assesses the functionality of the display unit, and verifies accurate readings from the transducer. A comprehensive system test ensures the entire setup operates as intended, maximizing the benefits of the technology and minimizing the risk of malfunctions during use. Cause and effect are directly linked; thorough testing contributes directly to successful on-the-water performance. For instance, neglecting to test the system might result in discovering a faulty connection or inaccurate depth readings only after arriving at the fishing destination, rendering the fish finder useless for the outing. Conversely, a comprehensive system test allows for identification and resolution of any issues in a controlled environment, ensuring a smooth and productive fishing experience.
Several key aspects comprise a thorough system test. Powering on the fish finder and verifying the display illuminates correctly is the initial step. Checking the transducer for proper operation involves confirming depth readings and sonar returns in a controlled environment, such as a bucket of water or a shallow, calm body of water. This verifies accurate data transmission and reception. Examining all cable connections for secure attachment and proper waterproofing ensures the integrity of the electrical system. Testing the functionality of buttons and menu options confirms proper operation of the user interface. Finally, evaluating battery performance under load verifies sufficient power delivery and estimates runtime based on anticipated usage patterns. Real-life examples highlight the practical significance of this understanding. A weak battery connection might go unnoticed without a system test, potentially causing the fish finder to shut down unexpectedly during use. A loose transducer cable could result in intermittent sonar readings, leading to inaccurate assessments of underwater features. Addressing these potential issues through preemptive testing ensures the fish finder performs reliably when it matters most.
In summary, system testing is not merely a recommended step but a fundamental component of successful fish finder installation. It represents the final quality control measure, guaranteeing the entire setup operates as a cohesive and reliable unit. This proactive approach prevents potential malfunctions, maximizes the utility of the fish finder technology, and contributes significantly to a productive and enjoyable fishing experience. Challenges such as identifying intermittent faults or ensuring consistent power delivery can be effectively addressed through a systematic and thorough testing procedure. This diligent approach empowers anglers with confidence in their equipment, allowing them to focus on the task at hand locating and catching fish.
Frequently Asked Questions
Addressing common queries regarding fish finder installation on kayaks clarifies potential uncertainties and promotes successful integration of this technology.
Question 1: What type of transducer is best suited for kayak use?
Transducer selection depends on kayak hull material and desired fishing style. Transom-mount transducers suit rigid kayaks with a defined transom. Scupper-mount transducers offer convenience for kayaks with scupper holes. Inside-hull transducers, while slightly less sensitive, avoid external protrusions. Inflatable kayaks often benefit from portable transducer mounts.
Question 2: How is a fish finder powered on a kayak?
Typically, a dedicated 12-volt marine battery powers kayak fish finders. Battery size depends on fish finder power consumption and desired runtime. Ensuring proper waterproofing and secure mounting of the battery box is essential.
Question 3: Where should the display unit be mounted for optimal visibility?
Display placement prioritizes clear visibility and convenient access while paddling. Adjustable mounts allow for customization based on angler preference and kayak layout. Avoiding interference with paddle strokes and minimizing glare are key considerations.
Question 4: What wiring considerations are specific to kayak installations?
Marine-grade tinned copper wire is recommended for corrosion resistance. Properly waterproofing connections and securing cables with zip ties or adhesive clips prevents damage and interference with paddling.
Question 5: How does one choose the correct mounting hardware for a fish finder on a kayak?
Mounting hardware selection depends on kayak type and available mounting points. Track systems, RAM mounts, and adhesive mounts offer varying degrees of flexibility and stability. Compatibility with fish finder components and kayak structure is paramount.
Question 6: What steps are involved in testing a fish finder installation before use?
Testing includes powering on the unit, verifying display functionality, checking transducer readings in a controlled environment, and confirming secure wiring and waterproofed connections. This ensures all components function correctly before deployment on the water.
Addressing these common queries enhances understanding and promotes informed decision-making regarding fish finder installation on kayaks. Successful integration depends on careful consideration of these factors and proper execution of installation procedures.
Proper installation of fish finder technology enhances angling experiences, providing valuable underwater insights and contributing to safer navigation. Addressing potential challenges proactively contributes to a more productive and enjoyable time on the water.
Conclusion
Successfully integrating a fish finder onto a kayak involves careful consideration of several key factors. Appropriate transducer selection and placement, coupled with secure wiring and a reliable power source, ensure optimal sonar performance. Strategic display mounting prioritizes visibility and accessibility without compromising paddling efficiency. Compatibility between kayak design and fish finder components dictates mounting options and overall system effectiveness. Rigorous system testing prior to deployment verifies proper function and minimizes potential issues on the water. Each of these elements contributes to a seamless and functional setup, maximizing the benefits of this technology for anglers.
Effective utilization of sonar technology significantly enhances angling opportunities from a kayak. Improved understanding of underwater terrain, fish location, and depth contours empowers anglers to make informed decisions, leading to increased fishing success. Careful planning and execution of the installation process ensures reliable operation, maximizes the return on investment, and contributes to safer and more productive fishing expeditions. Embracing these principles allows anglers to fully leverage the advantages of sonar technology and elevate their kayak fishing experience.


