Equipping a kayak with a sonar device involves several key steps, from selecting the right equipment and power source to correctly mounting the transducer and display unit. This process typically includes choosing a suitable location for each component, securing them safely, and managing the necessary wiring for a clean and functional installation. For example, transducer placement often involves mounting it inside the hull for optimal performance in calmer waters or using a scupper mount or trolling motor for more versatile use.
The ability to locate fish and understand underwater terrain significantly enhances the kayaking angling experience. Knowing water depth, bottom structure, and fish presence allows for more strategic fishing, increasing the chances of a successful catch. This technological advancement builds upon traditional angling techniques, providing a modern advantage in understanding the aquatic environment. Improved fish finding capabilities can lead to more efficient use of time on the water and a deeper appreciation for the underwater world.
This article will explore the various methods of transducer installation, including through-hull, transom mount, and portable options. It will also delve into power supply considerations, wiring best practices, and display unit mounting techniques to provide a comprehensive guide for equipping a kayak with sonar technology.
Tips for Kayak Fish Finder Installation
Proper installation ensures optimal performance and longevity of the fish finder system. Attention to detail during the setup process is crucial for a clean, functional, and safe installation.
Tip 1: Transducer Placement is Key: Consider the kayak’s hull design and typical fishing environment when selecting a transducer location. Inside-hull mounting offers the best protection and performance in calm waters. Transom mounts or trolling motor mounts provide versatility for different water conditions.
Tip 2: Secure Wiring is Essential: Use marine-grade wiring and connectors to protect against corrosion. Route wires carefully to avoid interference with paddling and fishing activities. Secure wires with zip ties or clips to prevent entanglement and damage.
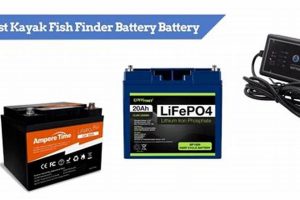
Tip 3: Power Source Selection Matters: Choose a reliable and appropriately sized battery for the fish finder. Consider battery life and ensure proper connections to avoid power fluctuations or system failures. A dedicated 12V battery is often recommended.
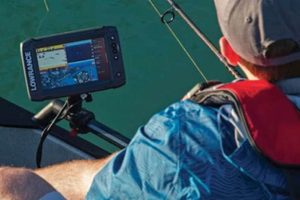
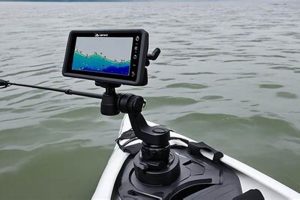
Tip 4: Display Mounting for Optimal Viewing: Select a mounting location for the display unit that allows for easy viewing while maintaining paddling ergonomics. Consider using a RAM mount or similar adjustable system for flexibility and optimal screen visibility.
Tip 5: Waterproof all Connections: Use marine-grade sealant or heat shrink tubing on all electrical connections to prevent water intrusion and corrosion. This safeguards the system from damage and ensures long-term functionality.
Tip 6: Test the System Thoroughly: Before venturing onto the water, test the fish finder system thoroughly in a controlled environment. Verify all connections, ensure the transducer is functioning correctly, and familiarize oneself with the display unit’s features.
Tip 7: Consult Manufacturer Instructions: Refer to the manufacturer’s instructions for specific guidance regarding installation and operation. These instructions provide valuable insights and recommendations tailored to the specific fish finder model.
Careful consideration of these tips will contribute to a successful fish finder installation, enhancing angling experiences on the water. A well-integrated system provides valuable information about the underwater environment, leading to more efficient and enjoyable fishing trips.
By following these guidelines, anglers can confidently integrate sonar technology into their kayak fishing setup, gaining a significant advantage in understanding and navigating the underwater world.
1. Power Source
A reliable power source is fundamental to the operation of a fish finder in a kayak. The chosen power supply dictates the fish finder’s operational duration and consistent performance. Selecting an inadequate power source can lead to premature battery depletion, system instability, or even device failure. Common choices include dedicated 12V marine batteries, which offer ample power and longevity. Smaller, portable power packs are also viable, particularly for shorter trips or less power-intensive units. Connecting the power source correctly is paramount, involving properly sized wiring, marine-grade connectors, and inline fuses for safety. For example, a fish finder drawing a higher amperage requires a battery with a larger capacity and appropriately sized wiring to handle the current. Ignoring these factors can result in voltage drops, system malfunctions, and potential safety hazards.
The type of fish finder influences the power requirements. Units with larger displays, advanced features, or multiple transducers naturally demand more power. Analyzing the fish finder’s power consumption specifications is crucial before selecting a battery. This ensures adequate power for the duration of the fishing trip. Further, cold weather conditions can impact battery performance, reducing overall capacity. Therefore, considering the fishing environment and anticipated temperatures is essential for selecting a power source with sufficient reserves. For instance, opting for a larger capacity battery or carrying a spare battery provides a safeguard against unexpected power drain in colder climates.
In summary, proper power source selection and connection are vital for a functional and safe fish finder setup on a kayak. Understanding the fish finder’s power requirements, choosing an appropriate battery, and ensuring correct wiring practices contribute significantly to a successful fishing experience. Neglecting these aspects can lead to equipment failure and compromise safety on the water.
2. Transducer Placement
Optimal transducer placement is critical for accurate readings and efficient operation of a fish finder installed on a kayak. Incorrect placement can result in interference, reduced sensitivity, and inaccurate depth or fish location data. Understanding the various mounting options and selecting the appropriate method for the kayak’s hull and typical fishing environment is essential for maximizing the fish finder’s effectiveness.
- Inside-Hull Mounting
This method involves adhering the transducer to the inside of the kayak’s hull, typically using epoxy or a specialized sealant. Inside-hull mounting offers excellent protection for the transducer and performs well in calm water conditions. However, it may experience slight signal loss compared to other mounting methods and is not suitable for kayaks with particularly thick or complex hull structures. It is generally preferred for calmer waters and provides a clean, streamlined installation.
- Transom Mounting
A transom mount affixes the transducer to the back of the kayak, offering a relatively simple installation process. This method works well in various water conditions and provides strong signal performance. However, the transducer is more exposed to potential damage and may create drag in the water. Kayaks with suitable transom designs can benefit from this straightforward approach.
- Trolling Motor Mounting
Mounting the transducer on a trolling motor allows for adjustable positioning and optimal depth readings, particularly in deeper water or when trolling. This method provides flexibility but requires a trolling motor setup and may be susceptible to interference from the motor itself. Kayak anglers who utilize trolling motors often find this method advantageous.
- Portable Mounting
Portable transducer mounts, such as suction cup mounts or temporary brackets, offer flexibility for quick setup and removal. These options are suitable for anglers frequently changing kayaks or preferring a non-permanent installation. However, portable mounts may be less stable than permanent installations and require careful positioning to ensure accurate readings. This method offers convenience but may compromise signal consistency compared to fixed installations.
Choosing the appropriate transducer placement method depends on factors such as the kayak’s hull design, typical fishing conditions, and desired level of performance and convenience. Careful consideration of these factors ensures optimal fish finder operation and enhances the overall fishing experience. Selecting the right placement method is a crucial step in effectively integrating a fish finder into a kayak fishing setup.
3. Wiring Management
Effective wiring management is crucial for a successful fish finder installation on a kayak. Proper routing and securing of cables ensures the system’s longevity, prevents interference with other onboard electronics, and minimizes potential safety hazards. Chafing, exposure to water, and loose connections can lead to system malfunctions or even complete failure. For example, improperly routed transducer cables rubbing against the kayak’s hull can wear through the insulation, causing short circuits or signal loss. Similarly, loose power connections can interrupt power supply, rendering the fish finder inoperable.
Several strategies contribute to effective wiring management. Using marine-grade wiring and connectors ensures resistance to corrosion and environmental stressors. Strategic cable routing, utilizing existing channels or creating dedicated pathways, keeps wires organized and protected. Securing cables with zip ties, clips, or adhesive mounts minimizes movement and prevents entanglement. Waterproofing connections with marine sealant or heat shrink tubing provides further protection against water intrusion. For instance, routing the power cable along the inside of the hull and securing it with adhesive clips protects the cable from damage and ensures a clean installation. Using waterproof connectors at the battery terminals safeguards against corrosion and maintains a reliable power supply.
Systematic wiring practices contribute significantly to a reliable and functional fish finder setup. Careful planning and execution of cable routing and securing minimize potential problems, reduce troubleshooting needs, and enhance the overall fishing experience. Addressing these aspects during installation safeguards the investment in the fish finder and ensures consistent performance on the water. This meticulous approach ultimately contributes to a safer and more enjoyable kayaking experience.
4. Display Mounting
Effective display mounting is integral to a successful fish finder installation on a kayak. Proper placement and secure mounting of the display unit ensure clear visibility, convenient operation, and minimal interference with paddling. A poorly mounted display can obstruct the angler’s view, hinder paddle strokes, and compromise safety. Conversely, a well-positioned and securely mounted display enhances situational awareness, improves fishing efficiency, and contributes to a more enjoyable experience on the water.
- Mounting Location Considerations
Selecting an appropriate mounting location requires careful consideration of factors such as kayak layout, paddling style, and potential glare. Common locations include the kayak’s dashboard, deck rigging, or a dedicated mounting arm. Mounting the display near existing instrumentation or within easy reach minimizes distractions and allows for quick adjustments. For example, positioning the display near the paddle stroke avoids interference and maintains a clear view of the surrounding environment. Analyzing potential glare sources, such as direct sunlight or reflections from the water, helps determine the optimal mounting angle and location for optimal screen visibility.
- Mounting Hardware and Stability
Using appropriate mounting hardware ensures the display unit remains securely attached to the kayak, even in rough water conditions. RAM mounts, specialized kayak fish finder mounts, and custom fabricated brackets offer varying degrees of adjustability and stability. Selecting robust hardware appropriate for the display’s size and weight prevents unwanted movement or detachment during use. For instance, a heavier display unit requires a more substantial mount than a smaller, lighter unit. Testing the mount’s stability before venturing into open water ensures the display remains secure in various conditions.
- Viewing Angle and Ergonomics
Adjusting the display’s viewing angle for optimal ergonomics enhances comfort and reduces strain during extended fishing trips. A properly angled display minimizes glare, maximizes readability, and allows the angler to maintain a comfortable posture. For example, tilting the display slightly upward can reduce glare from the water’s surface, while positioning it within easy reach minimizes the need for excessive stretching or bending. Considering the angler’s height and paddling position contributes to a customized setup that promotes comfort and efficiency.
- Wiring Integration and Aesthetics
Integrating the display’s wiring into the kayak’s existing electrical system maintains a clean and organized appearance. Routing cables neatly and securing them with clips or ties prevents entanglement and minimizes clutter. Waterproof connectors and marine-grade wiring protect against corrosion and ensure reliable operation. For example, routing the display’s power cable along the kayak’s gunwale and securing it with clips provides a clean, professional look and protects the wiring from damage. Careful wire management enhances both the aesthetics and functionality of the fish finder installation.
By carefully considering these factors related to display mounting, anglers can create a functional and ergonomic setup that enhances their fishing experience. A well-mounted display improves situational awareness, facilitates efficient operation of the fish finder, and contributes to a safer and more enjoyable time on the water. These elements are essential considerations in effectively integrating a fish finder into a kayak and maximizing its potential for improving fishing success.
5. System Configuration
System configuration represents a crucial final step in the process of integrating a fish finder into a kayak. This stage encompasses adjusting settings to optimize performance based on environmental factors, target species, and personal preferences. The process directly impacts the effectiveness of the fish finder, influencing the clarity of readings and the angler’s ability to interpret displayed information. For instance, sensitivity adjustments can filter out noise in shallow or turbulent water, while adjusting depth ranges optimizes the display for specific fishing locations. Failure to configure the system correctly can lead to misinterpretations of data, reducing the fish finder’s utility. A poorly configured system might display excessive clutter, making it difficult to identify fish or bottom structure, or it might miss crucial details due to inappropriate sensitivity settings.
Understanding the relationship between system configuration and overall fish finder performance is essential for maximizing the benefits of this technology. Configuration options vary depending on the specific fish finder model, but typically include adjustments for sensitivity, depth range, sonar frequency, and display settings. For example, higher sonar frequencies provide detailed images of the bottom and are well-suited for shallow water fishing, while lower frequencies penetrate deeper but offer less detail. Similarly, adjusting the chart speed influences how quickly sonar data scrolls across the screen, impacting the angler’s ability to track fish movement. Understanding these settings and adjusting them appropriately based on the prevailing conditions and fishing goals are crucial for effective fish finding. Consider a scenario where an angler is targeting fish near the bottom in deep water. Configuring the fish finder with a lower sonar frequency and adjusting the gain to reduce surface clutter will optimize the display for identifying fish near the bottom. Conversely, in shallow, weedy areas, a higher frequency and increased sensitivity might be necessary to distinguish fish from vegetation.
In conclusion, proper system configuration maximizes the effectiveness of a fish finder, translating raw data into actionable information. This step directly influences the angler’s ability to interpret underwater conditions, locate fish, and ultimately enhance fishing success. Failing to configure the system correctly can significantly diminish the utility of the fish finder, rendering it less effective in achieving its primary purpose. Therefore, understanding the various configuration options and applying them strategically based on specific fishing scenarios is an essential component of successful fish finder utilization.
Frequently Asked Questions
This section addresses common inquiries regarding kayak fish finder installations, offering concise and informative responses to facilitate a comprehensive understanding of the process.
Question 1: What type of fish finder is best suited for kayak fishing?
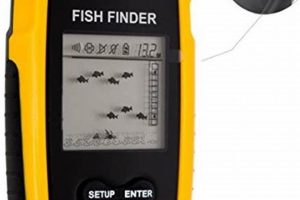
Fish finder selection depends on individual needs and budget. Compact units with GPS and chartplotting capabilities are often preferred for their portability and functionality. Consider display size, sonar frequency, and power consumption when making a selection.
Question 2: Can a standard fish finder transducer be used on a kayak?
Yes, many standard transducers are adaptable to kayaks. However, consider the kayak’s hull material and shape when choosing a mounting location and method. Inside-hull, transom, and trolling motor mounts are common options for kayaks.
Question 3: How long does a fish finder battery typically last in a kayak?
Battery life depends on battery capacity, fish finder power consumption, and usage patterns. A dedicated 12V marine battery typically provides sufficient power for a full day of fishing. Smaller, portable power packs offer shorter run times.
Question 4: Is it necessary to use marine-grade wiring for a kayak fish finder installation?
Marine-grade wiring is highly recommended. It withstands harsh marine environments, resists corrosion, and ensures the longevity and reliability of the fish finder system. Standard automotive wiring is not suitable for prolonged exposure to moisture and saltwater.
Question 5: What is the best way to protect a fish finder display from the elements?
A waterproof cover or case protects the display unit when not in use. Ensure the mounting location minimizes exposure to direct sunlight and splashing water. Regular cleaning of the display with a damp cloth maintains visibility.
Question 6: How does one troubleshoot a malfunctioning fish finder on a kayak?
Begin by checking all connections and ensuring the battery is adequately charged. Verify transducer placement and examine wiring for damage. Consulting the manufacturer’s troubleshooting guide often provides specific solutions to common issues.
Addressing these common inquiries provides a foundational understanding of kayak fish finder installations. Careful consideration of these points ensures a successful and rewarding integration of this valuable tool into the kayak fishing experience.
For further assistance, consult specialized resources or seek guidance from experienced kayak anglers or marine electronics professionals.
Conclusion
Successfully integrating a fish finder into a kayak fishing setup involves careful consideration of several key factors. Appropriate power source selection ensures consistent operation, while strategic transducer placement maximizes accuracy and performance. Meticulous wiring management safeguards the system’s longevity and prevents interference. Ergonomic display mounting enhances visibility and operational convenience. Finally, proper system configuration tailors the fish finder’s capabilities to specific fishing scenarios.
Effective utilization of sonar technology significantly enhances angling opportunities from a kayak. Strategic placement of transducers and displays, combined with informed power management and system configuration, allows anglers to gain valuable insights into underwater environments. This knowledge translates to improved fish-finding capabilities and a more informed, successful angling experience. Embracing technological advancements empowers anglers to explore beneath the surface, fostering a deeper understanding of aquatic ecosystems and promoting responsible fishing practices.


