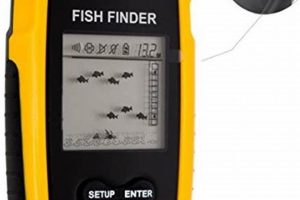
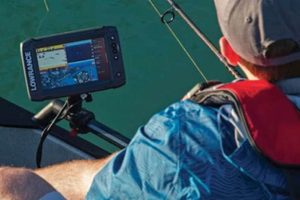
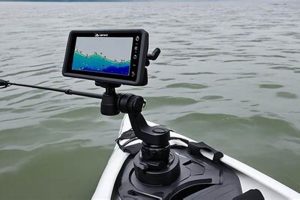
Equipping a small watercraft with sonar technology provides anglers enhanced awareness of underwater environments. This involves mounting a transducer, the component that sends and receives sonar signals, to the kayak’s hull or using a portable, floating transducer. The display unit, which interprets and presents the data, is typically secured within easy reach of the paddler. Power is supplied by a battery, often a dedicated 12-volt unit.
This technological integration significantly increases the likelihood of locating fish, determining water depth and identifying underwater structures. Knowing these factors helps anglers make more informed decisions about where to cast their lines, potentially increasing their catch rate. While traditional methods like studying water conditions and observing natural indicators remain valuable, modern sonar systems offer a level of precision and real-time data that enhances the angling experience. This capability has become increasingly important as fishing pressure rises and anglers seek to minimize their impact on fish populations by maximizing efficiency.
The following sections will detail various mounting techniques, transducer choices, power supply options, and display unit considerations, offering a practical guide to outfitting a kayak with this valuable technology.
Tips for Effective Sonar System Integration on Kayaks
Careful planning and execution are crucial for optimal sonar system performance and longevity. These tips offer guidance for a successful installation.
Tip 1: Transducer Placement: Select a location that minimizes interference from the kayak’s hull and ensures consistent contact with the water. Flat surfaces away from major structural features are typically ideal. For hull-mounted transducers, meticulous preparation of the mounting surface is vital for optimal signal transmission.
Tip 2: Cable Management: Securely route cables to prevent entanglement and damage. Use cable ties or clips to keep wiring organized and protected from the elements and fishing gear. Consider utilizing existing channels or recesses within the kayak for a streamlined appearance.
Tip 3: Power Source Considerations: Choose a battery with sufficient capacity to power the sonar unit for the duration of planned fishing trips. Factor in potential power draw from other devices. Securely mount the battery in a readily accessible yet protected location.
Tip 4: Display Unit Mounting: Position the display unit within clear view and easy reach, allowing for comfortable operation while maintaining paddle control. Consider using adjustable mounts that offer flexibility for different angling scenarios.
Tip 5: Waterproofing Measures: Ensure all connections and components are adequately sealed against water intrusion. Apply marine-grade sealant to any exposed wiring or penetrations through the kayak’s hull. Regularly inspect connections for signs of wear or damage.
Tip 6: Transducer Type Selection: Choose a transducer appropriate for the target fishing environment and species. Consider factors such as frequency and cone angle to optimize performance in various water depths and conditions.
Tip 7: Testing and Calibration: Before venturing out, test the system in shallow, controlled waters to confirm proper operation and calibrate settings. Familiarize oneself with the display unit’s features and functions for efficient interpretation of data.
By adhering to these guidelines, anglers can achieve a seamless and reliable sonar integration, maximizing the benefits of technology for a more productive and enjoyable fishing experience.
The information provided in this section offers practical guidance for maximizing the effectiveness of sonar systems on kayaks. Next, a summary of key takeaways will solidify understanding and pave the way for concluding remarks.
1. Transducer Placement
Accurate sonar readings depend heavily on proper transducer placement during fish finder installation. A poorly positioned transducer can result in distorted readings or complete signal loss, severely impacting the efficacy of the fish finder. Understanding the factors influencing optimal transducer placement is therefore critical for successful installation and maximizing the benefits of sonar technology.
- Inside Hull Mounting
This method involves adhering the transducer to the inside of the kayak hull. Ideal for smooth, flat-bottomed hulls, it offers protection from impact and minimizes drag. A thin layer of epoxy between the hull and transducer ensures optimal signal transmission. However, this method may slightly reduce sonar sensitivity compared to external mounting options. Compatibility with the hull material is crucial to ensure a strong bond.
- External Hull Mounting
External mounts secure the transducer to the outside of the hull. This method generally provides stronger sonar signals and is adaptable to a wider variety of hull shapes. However, external transducers are more susceptible to damage from underwater obstacles and require careful placement to minimize turbulence and interference. Securing the transducer in a streamlined manner minimizes drag and potential damage.
- Trolling Motor Mounting
Mounting the transducer on the trolling motor provides inherent advantages, especially in deeper water or when trolling. The transducer remains submerged and oriented correctly regardless of the kayak’s position. This method simplifies installation, requires no hull modifications, and keeps the transducer away from potential hull interference. Compatibility between the trolling motor and transducer is paramount.
- Portable Mounting
Portable transducers offer flexibility, particularly for anglers who use multiple kayaks or prefer a less permanent installation. These transducers can be suspended from the side of the kayak or attached to a temporary mount. While convenient, portable solutions can be susceptible to movement and may require adjustments to maintain optimal sonar performance. Careful positioning remains crucial for accurate readings.
Selecting the appropriate transducer placement method requires consideration of the kayak’s hull design, the intended fishing environment, and the angler’s preferences. A well-chosen location minimizes interference, maximizes sonar performance, and enhances the overall fishing experience. Each method offers unique advantages and limitations, emphasizing the need for careful evaluation during the fish finder installation process.
2. Wiring and Power
A reliable power supply and correctly executed wiring are fundamental to the successful operation of a kayak’s fish finder. Insufficient power or faulty wiring can lead to intermittent function, inaccurate readings, or complete system failure. The power source, typically a 12-volt battery, must be appropriately sized to meet the fish finder’s power demands. Wiring must be marine-grade to withstand exposure to moisture and UV radiation. Correctly connecting the power leads to the fish finder and battery, ensuring proper polarity, is essential. For example, using insufficiently gauged wiring can lead to voltage drop, affecting fish finder performance. Fusing the power circuit protects the system from overloads and potential damage.
Several wiring approaches exist, each offering specific advantages. Direct wiring to the battery offers the most straightforward approach but may necessitate longer cable runs. Using a dedicated power distribution block provides a centralized connection point for multiple accessories, simplifying wiring management. Incorporating a fuse box or inline fuse near the battery safeguards the system from short circuits. Careful cable routing is crucial to prevent interference with other kayak equipment and minimize trip hazards. Securing cables with cable ties or clips prevents entanglement and protects them from damage. Understanding these wiring principles is critical for ensuring a safe and functional fish finder installation.
Effective power management extends beyond the initial installation. Monitoring battery health and ensuring adequate charge before each fishing trip is essential for uninterrupted operation. Disconnecting the fish finder from the power source when not in use conserves battery life. Regular inspection of wiring for signs of wear or corrosion helps prevent potential issues. Addressing these aspects ensures the fish finder functions reliably, providing valuable data during each outing. Understanding the interplay of power supply and wiring contributes significantly to a successful and long-lasting fish finder installation.
3. Display Mounting
Display mounting constitutes a critical element of fish finder installation on a kayak. Effective display placement directly influences usability and, consequently, the angler’s ability to interpret crucial underwater data. Incorrect mounting can obstruct paddling, limit visibility, or expose the display unit to damage. Conversely, strategic mounting enhances situational awareness, improves reaction time, and maximizes the fish finder’s utility. Consider, for example, an angler navigating through shallow, obstacle-filled waters. A poorly positioned display may impede their ability to react quickly to depth changes or submerged hazards. In contrast, a clearly visible and readily accessible display facilitates informed decision-making, contributing significantly to navigation safety and fishing success. The mounting location must therefore balance accessibility with protection and minimize interference with paddling ergonomics.
Several factors influence optimal display placement. Kayak design, angler preference, and fishing style all play a role. Common mounting locations include the deck, dashboard, or a dedicated mounting arm. Each location presents unique advantages and disadvantages. Deck mounting offers a secure and central position, but may require the angler to look down, momentarily diverting attention from the water. Dashboard mounting, often favored for its clear line of sight, may limit available space for other essential gear. Mounting arms offer flexibility and adjustability, enabling customized positioning, but introduce potential points of failure if not robustly constructed. Choosing the appropriate mounting method necessitates careful consideration of these trade-offs and their practical implications for the individual angler.
Successful display mounting, therefore, requires more than simply affixing the unit to the kayak. It necessitates a holistic understanding of the interplay between angler, kayak, and fish finder. A well-mounted display becomes an extension of the angler’s senses, providing real-time insights into the underwater environment without compromising paddling efficiency or safety. Conversely, inadequate mounting can detract from the fishing experience, hindering performance and potentially leading to frustration. Ultimately, thoughtful display placement enhances the overall integration of the fish finder system, transforming a collection of components into a powerful tool for enhancing angling success.
4. Kayak Compatibility
Kayak compatibility plays a crucial role in successful fish finder installation. Ignoring compatibility factors can lead to instability, mounting difficulties, and compromised performance. A thorough assessment of kayak characteristics ensures seamless integration and optimal functionality of the fish finder system. Understanding the interplay between kayak design and fish finder requirements is paramount for a productive and enjoyable angling experience. For example, a kayak with limited deck space might necessitate creative mounting solutions or the selection of a compact fish finder unit.
- Hull Material and Shape
Hull material influences transducer selection and mounting method. Smooth, flat surfaces are ideal for inside-hull transducer mounting. Irregular or textured surfaces may necessitate external mounting or specialized transducers. Hull shape affects transducer placement, requiring careful consideration of water flow and potential interference. For instance, a kayak with a pronounced keel might require a side-mounted transducer to avoid turbulence.
- Deck Space and Layout
Available deck space dictates display unit placement and battery storage options. Limited space necessitates compact units and strategic placement to avoid interference with paddling. Existing deck features, such as hatches or rails, can be leveraged for mounting or cable routing. A cluttered deck may require modifications to accommodate the fish finder system effectively.
- Stability and Weight Capacity
Added weight from the fish finder, battery, and accessories can impact kayak stability. Exceeding the weight capacity can compromise safety and maneuverability. Consider the combined weight of all installed components and their distribution across the kayak. Stability considerations are particularly crucial for smaller or less stable kayak designs.
- Cable Routing and Management
The kayak’s design influences cable routing options. Existing channels or recesses can be utilized to conceal and protect wiring. Kayaks lacking dedicated cable pathways necessitate careful planning to avoid entanglement and interference. Secure cable management enhances both aesthetics and functionality.
Careful consideration of these compatibility factors ensures the chosen fish finder system integrates seamlessly with the kayak’s design. Addressing these elements during the planning phase prevents installation challenges and maximizes long-term performance. Neglecting compatibility can lead to suboptimal fish finder performance and a compromised angling experience. A well-integrated system enhances both the functionality and enjoyment of kayak fishing.
5. System Configuration
System configuration represents the crucial final stage of fish finder installation on a kayak. Proper configuration maximizes the effectiveness of the sonar technology, allowing anglers to tailor settings to specific fishing environments and target species. Neglecting this step can lead to suboptimal performance, hindering the ability to interpret underwater data accurately. A well-configured system enhances situational awareness, improves fish identification, and ultimately contributes to a more successful angling experience.
- Sensitivity Adjustment
Sensitivity governs the amount of detail displayed on the fish finder screen. Higher sensitivity reveals subtle variations in the underwater environment, such as baitfish or thermoclines, but can also introduce clutter from noise or turbulence. Lower sensitivity filters out extraneous details, focusing on larger fish and structures. Adjusting sensitivity based on water clarity, depth, and target species maximizes the clarity and relevance of the displayed information. For example, higher sensitivity is beneficial in clear, deep water when targeting suspended fish, while lower sensitivity is preferable in shallow, murky water.
- Depth Range and Frequency Selection
Fish finders operate at different frequencies, each offering unique advantages. Higher frequencies (e.g., 200 kHz) provide greater detail and are effective in shallower water, while lower frequencies (e.g., 50 kHz) penetrate deeper but offer less resolution. Selecting the appropriate frequency and depth range ensures accurate bottom tracking and optimal fish detection at the desired depth. Anglers fishing in shallow, weedy areas benefit from higher frequencies, while those targeting deep-water species require lower frequencies.
- Sonar Display and Interpretation
Understanding how the fish finder represents underwater data is crucial for accurate interpretation. Familiarizing oneself with the various display modes, such as traditional 2D sonar, down-imaging, and side-imaging, enhances the ability to identify fish, structures, and bottom composition. Learning to distinguish fish arches from other sonar returns allows anglers to focus their efforts on productive areas. Regular practice and observation enhance interpretation skills.
- GPS Integration and Waypoint Management
Many modern fish finders integrate GPS technology, enabling precise location tracking and waypoint marking. Marking productive fishing spots or navigational hazards allows anglers to return to these locations efficiently. Effective waypoint management streamlines navigation and enhances fishing strategy. For example, marking a submerged reef or a drop-off allows anglers to revisit these areas without relying solely on memory.
Mastering these configuration aspects transforms the fish finder from a simple depth sounder into a powerful tool for understanding and interacting with the underwater world. A well-configured system provides valuable insights into fish behavior, habitat, and environmental conditions, ultimately contributing to increased angling success. Proper system configuration, therefore, represents a critical investment of time and effort that pays dividends on the water.
Frequently Asked Questions
This section addresses common queries regarding fish finder installations on kayaks, providing concise and informative responses.
Question 1: What type of transducer is best suited for kayak use?
Transducer choice depends on the intended fishing environment and target species. Transducers designed for shallower water typically operate at higher frequencies, while those for deeper water utilize lower frequencies. Consider factors such as kayak hull material and shape when selecting a mounting style (in-hull, transom-mount, or trolling motor-mount).
Question 2: How much battery power is required to operate a fish finder on a kayak?
Power consumption varies based on fish finder model and usage. A 12-volt battery with a capacity of 7 to 12 amp-hours is generally sufficient for a day of fishing. Consult the fish finder’s specifications for precise power requirements and consider potential power draw from other onboard electronics.
Question 3: Can a fish finder be installed on any type of kayak?
While fish finders can be installed on most kayaks, compatibility considerations exist. Factors such as hull material, deck space, and stability influence mounting options and system performance. Careful assessment of kayak characteristics is crucial before selecting and installing a fish finder.
Question 4: Is it difficult to install a fish finder on a kayak?
Installation complexity varies depending on the specific fish finder model and kayak design. Many installations can be completed with basic tools and readily available mounting hardware. Following manufacturer instructions carefully ensures proper installation and optimal performance. Professional installation services are available for those seeking assistance.
Question 5: How does one interpret the information displayed on a fish finder screen?
Understanding sonar returns, fish arches, and bottom contours requires practice and familiarity with the fish finder’s display modes. Consult the fish finder’s user manual for detailed information on interpreting displayed data. Online resources and instructional videos offer valuable insights into sonar interpretation techniques.
Question 6: What maintenance is required for a kayak fish finder installation?
Regular maintenance ensures optimal performance and longevity. Inspecting wiring for damage, keeping the transducer clean, and ensuring adequate battery charge are crucial. Protecting the display unit from direct sunlight and extreme temperatures prolongs its lifespan. Consult the manufacturer’s recommendations for specific maintenance procedures.
Addressing these frequently asked questions provides a foundation for informed decision-making regarding fish finder installations on kayaks. Understanding these key aspects contributes significantly to a successful and rewarding angling experience.
This FAQ section concludes the discussion on fish finder installation on kayaks. The subsequent section will offer concluding remarks and summarize key takeaways.
Fish Finder Installation on a Kayak
Successful fish finder installation on a kayak involves careful consideration of several interconnected factors. Appropriate transducer selection and placement are paramount for accurate sonar readings, influenced by hull characteristics and target fishing environments. Robust wiring and a reliable power supply ensure consistent operation, while thoughtful display mounting prioritizes both visibility and accessibility. Kayak compatibility considerations, encompassing hull design, deck space, and stability, are crucial for a balanced and functional setup. Finally, meticulous system configuration, including sensitivity adjustments, frequency selection, and sonar interpretation, unlocks the full potential of the technology.
Strategic integration of these elements transforms a kayak into a technologically advanced fishing platform. Enhanced awareness of underwater environments empowers anglers to make informed decisions, leading to increased efficiency and a deeper understanding of aquatic ecosystems. Continual advancements in sonar technology promise further refinement of these tools, offering exciting possibilities for future angling endeavors. Careful planning and execution of fish finder installation remain essential for maximizing the benefits of this technology, contributing to a more informed and rewarding fishing experience.


