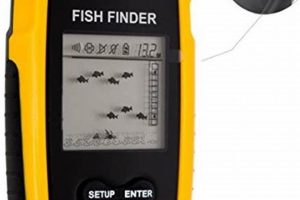
Equipping a kayak with sonar technology transforms the vessel into a powerful tool for locating fish. This involves mounting a transducer, typically on the hull or within a scupper hole, and connecting it to a display unit positioned within easy reach of the paddler. The display interprets sonar signals, revealing underwater structures, bottom contours, and, most importantly, the presence and location of fish.
This enhancement significantly improves angling success from a kayak by providing real-time underwater intelligence. It allows anglers to identify promising fishing spots, understand water depth and bottom composition, and track fish movement. Historically, kayak fishing relied heavily on intuition and knowledge of local waters. Modern electronics offer a significant advantage, especially in unfamiliar environments or when targeting specific species with known habitat preferences. This technology has democratized access to advanced fish-finding capabilities, once primarily available to larger, motorized boats.
This discussion will cover various aspects of integrating sonar systems with kayaks, including transducer installation methods, power supply options, display unit selection, and optimal configuration for different fishing scenarios.
Tips for Kayak Fish Finder Installation
Careful planning and execution are crucial for a successful fish finder installation on a kayak. These tips offer guidance for a clean, functional, and durable setup.
Tip 1: Transducer Placement: Select a location that minimizes turbulence and interference. Common options include mounting inside the hull for optimal protection or on the transom using a specialized bracket. Scupper hole mounting offers a compromise between protection and performance.
Tip 2: Cable Management: Secure cables tightly to the kayak using zip ties or adhesive clips. This prevents tangling and protects the wiring from damage. Consider using a battery box or dedicated compartment to house power connections and excess cable.
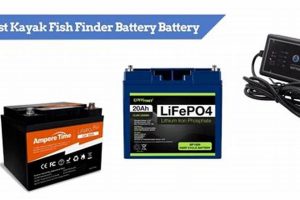
Tip 3: Power Source Selection: Choose a reliable power source appropriate for the fish finder’s requirements. A dedicated 12V battery provides consistent power, while smaller, portable power packs offer a lighter alternative for shorter trips.
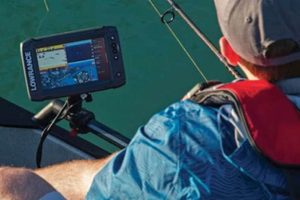
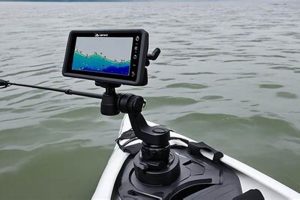
Tip 4: Display Mounting: Position the display unit within easy reach and clear line of sight for comfortable viewing while paddling. Utilize adjustable mounts to accommodate different paddling styles and preferences.
Tip 5: Waterproofing: Ensure all connections and exposed components are adequately sealed against water intrusion. Use marine-grade sealant and waterproof connectors to prevent corrosion and electrical malfunctions.
Tip 6: Interference Prevention: Keep transducer cables away from other electrical wiring to minimize interference. Test the system thoroughly after installation to ensure optimal performance and identify any potential issues.
Tip 7: Transducer Compatibility: Select a transducer compatible with the fish finder unit and the type of water being fished (freshwater or saltwater). Consider the transducer’s frequency and cone angle for optimal performance in specific depths and conditions.
Proper installation ensures reliable operation and maximizes the effectiveness of the fish finder, enhancing the overall kayak fishing experience.
By following these guidelines, anglers can confidently integrate sonar technology into their kayaks, unlocking greater potential for success on the water.
1. Planning
Effective integration of a fish finder into a kayak fishing system hinges critically on thorough planning. This pre-installation phase dictates long-term functionality and ease of use. Careful consideration of factors such as transducer placement, wiring routes, power supply, and display mounting location prevents costly rework and ensures optimal performance. For example, failure to plan cable routing can lead to tangled lines, interference with paddling, and potential damage to the wiring. Similarly, inadequate consideration of power supply needs might result in premature battery depletion, cutting fishing trips short. A well-planned installation, conversely, results in a clean, efficient setup that maximizes the benefits of the fish finder technology.
Planning also involves selecting appropriate equipment. Different transducers suit different hull types and fishing styles. Kayak size and the angler’s typical fishing environment influence power supply choices. Display size and features should align with available space and user preferences. For instance, a smaller kayak might necessitate a compact display unit and a transom-mounted transducer, while a larger kayak might accommodate a larger screen and an in-hull transducer. Understanding these nuances during the planning stage ensures compatibility and optimizes the system for specific needs. Pre-emptive research on transducer frequencies and cone angles allows anglers to tailor their equipment to target specific fish species and depths.
In essence, meticulous planning minimizes potential issues, streamlines the installation process, and ultimately enhances the overall fishing experience. Addressing potential challenges upfrontsuch as waterproofing needs, cable management solutions, and display visibilitymitigates future problems and ensures the long-term reliability of the fish finder system. This proactive approach translates to more time spent fishing effectively and less time troubleshooting technical difficulties on the water. Investing time in comprehensive planning ultimately contributes to a more successful and enjoyable kayak fishing experience.
2. Installation
Installation represents the critical link between acquiring a fish finder and utilizing its capabilities on the water. A properly executed installation ensures the fish finder functions as intended, providing accurate readings and contributing to a successful fishing experience. Conversely, a poorly executed installation can lead to a range of problems, including inaccurate readings, short circuits, and even damage to the kayak or the electronics themselves. The installation process encompasses several key stages, each impacting the overall system’s performance.
These stages include transducer placement, cable routing, power supply connection, and display unit mounting. Transducer placement significantly impacts the quality of sonar readings. An incorrectly positioned transducer can create interference, reducing accuracy and limiting the effective range of the device. For example, placing a transducer too close to a motor or paddle can create turbulent water flow, disrupting sonar signals and rendering the fish finder ineffective. Careful cable routing prevents tangling, minimizes signal interference, and protects the wiring from damage. Securing cables with zip ties or adhesive clips keeps them organized and prevents accidental snags. Power supply connections must be secure and waterproof to ensure reliable operation and prevent corrosion. Finally, proper display mounting positions the screen for optimal visibility without interfering with paddling or other essential kayak functions. An adjustable mount allows for customization based on individual preferences and kayak layout.
Successful installation requires attention to detail and an understanding of the system’s components. Following manufacturer instructions and utilizing appropriate tools and materials ensures a durable and functional setup. While professional installation services offer a convenient alternative, understanding the process empowers kayak anglers to maintain and troubleshoot their systems effectively. Ultimately, a well-executed installation translates to improved fish finding capabilities, enhanced angling success, and greater enjoyment on the water.
3. Power Source
Power source selection represents a critical decision when integrating a fish finder into a kayak. Fish finders require a stable and reliable power supply for optimal performance. The choice of power source directly impacts operational duration, portability, and overall system weight. Understanding power requirements and available options allows for informed decisions tailored to individual fishing styles and needs. An inadequate power supply can lead to intermittent operation, inaccurate readings, and premature battery failure, effectively negating the benefits of having a fish finder. Conversely, a well-chosen power source ensures consistent performance, maximizing the fish finder’s utility and enhancing the angling experience.
Common power source options include dedicated 12V marine batteries, portable power packs, and kayak-specific power systems. Marine batteries offer high capacity and consistent output, ideal for extended trips and demanding fish finders. However, they add significant weight and require careful charging and maintenance. Portable power packs provide a lighter alternative, suitable for shorter outings or smaller kayaks where weight is a primary concern. These packs, however, offer limited capacity and require regular recharging. Kayak-specific power systems integrate seamlessly with the vessel, often incorporating dedicated compartments and wiring solutions. These systems offer a balance of convenience and performance, but may require professional installation and represent a higher initial investment. For example, a kayak angler targeting offshore species might opt for a high-capacity marine battery to power a sophisticated fish finder during extended trips. Conversely, an angler fishing smaller lakes or rivers might choose a portable power pack to minimize weight and complexity. Understanding these trade-offs empowers anglers to make informed decisions aligned with their specific needs.
Careful consideration of power consumption, trip duration, and portability requirements informs effective power source selection. Factors such as fish finder model, screen size, and transducer type influence overall power draw. Anticipating the length of fishing trips and the availability of charging facilities further refines the decision-making process. Finally, evaluating the weight and bulk of different power solutions ensures compatibility with the kayak’s carrying capacity and maneuverability. A thorough assessment of these factors ensures reliable fish finder operation, contributing to a more productive and enjoyable fishing experience. Neglecting power source considerations can compromise the entire system’s effectiveness, highlighting the integral role of reliable power in maximizing the benefits of kayak fish finder technology.
4. Transducer Choice
Transducer selection represents a pivotal decision when adding a fish finder to a kayak. The transducer acts as the eyes of the system, transmitting and receiving sonar signals that paint a picture of the underwater environment. Choosing the correct transducer significantly impacts the quality of data received, influencing fishing success. Different transducers offer varying capabilities tailored to specific fishing environments, target species, and kayak configurations. Careful consideration of transducer characteristics ensures optimal performance and maximizes the investment in fish-finding technology.
- Transducer Type
Various transducer types exist, each designed for specific applications. In-hull transducers mount inside the kayak’s hull, offering protection and streamlined performance in calm water. Transom-mount transducers attach to the kayak’s stern, providing versatility and adaptability to various hull shapes. Scupper-mount transducers offer a compromise between protection and performance, fitting within existing scupper holes. Choosing the right type depends on kayak design, typical fishing conditions, and desired performance characteristics. For instance, an angler frequently navigating shallow, rocky waters might prefer an in-hull transducer for its protection, while an angler fishing primarily in deeper, open water could opt for a transom-mount transducer for its stronger signal.
- Frequency
Transducers operate at different frequencies, each affecting depth penetration and target detail. Higher frequencies (e.g., 200 kHz) provide greater detail and are suitable for shallower water and targeting specific fish. Lower frequencies (e.g., 83 kHz) penetrate deeper water but offer less detail. Dual-frequency transducers combine both, providing versatility across various depths and fishing scenarios. Understanding frequency characteristics allows anglers to choose a transducer optimized for their target fishing grounds and species. An angler fishing primarily in deep lakes might choose a lower frequency for better bottom tracking, while an angler targeting fish in shallower rivers would benefit from the higher-frequency detail.
- Cone Angle
Cone angle dictates the area covered by the sonar beam. Wider cone angles (e.g., 20 degrees) cover a larger area, suitable for searching broader areas and locating fish schools. Narrower cone angles (e.g., 8 degrees) provide greater detail and precision, ideal for targeting individual fish and navigating complex structures. The choice depends on fishing style and the type of information sought. A wider cone angle suits anglers searching for general fish activity, while a narrower cone angle benefits anglers seeking specific targets or detailed bottom contour information.
- Power
Transducer power influences signal strength and depth penetration. Higher-powered transducers offer greater range and clarity in deeper water or challenging conditions. Lower-powered transducers suffice for shallower waters and less demanding applications. Matching transducer power to the fish finder unit ensures optimal performance and avoids overloading the system. An angler regularly fishing offshore would benefit from a higher-powered transducer to cut through wave action and reach deeper depths, while an angler fishing small ponds might find a lower-powered option perfectly adequate. Choosing the appropriate power ensures the fish finder operates efficiently and provides accurate readings.
Selecting the right transducer significantly impacts the effectiveness of a kayak fish finder setup. Understanding the interplay between transducer type, frequency, cone angle, and power allows anglers to make informed decisions. Matching transducer characteristics to specific fishing needs ensures optimal performance, transforming the kayak into a highly effective fishing platform. Ignoring these factors can lead to suboptimal results, hindering fish finding capabilities and diminishing the overall fishing experience. Therefore, careful transducer selection represents a crucial step in maximizing the benefits of adding a fish finder to a kayak.
5. Display Setup
Display setup constitutes a crucial element when integrating a fish finder into a kayak. The display acts as the interface between the transducer’s sonar data and the angler’s interpretation. Effective display setup directly impacts the angler’s ability to comprehend underwater information, influencing decision-making and fishing success. A poorly configured display can render even the most sophisticated sonar technology ineffective, while a well-organized display maximizes data utility, contributing to a more informed and productive fishing experience.
Several factors contribute to optimal display setup. Screen size and resolution influence readability, especially in bright sunlight or challenging weather conditions. A larger, higher-resolution screen allows for clearer visualization of underwater structures, fish, and bottom contours. Mounting location and angle affect visibility and accessibility while paddling. Positioning the display within easy reach and clear line of sight minimizes distractions and allows for quick glances without compromising paddling efficiency. Adjustability in mounting systems caters to individual preferences and kayak configurations. For example, a kayak angler fishing in open, sunny conditions would benefit from a larger, high-brightness display mounted at an optimal viewing angle, while an angler fishing in overcast conditions might prioritize a compact display positioned closer to the cockpit for easy reach. Customization options within the fish finder’s software, such as color palettes, depth ranges, and sensitivity adjustments, allow anglers to tailor the display to specific fishing scenarios and target species. An angler targeting deep-water fish might adjust the depth range and sensitivity to focus on bottom structure and larger fish, while an angler fishing for shallow-water panfish might prioritize a higher sensitivity and a shallower depth range.
Understanding the interplay between display settings, environmental conditions, and fishing objectives empowers anglers to optimize their setup. Proper display configuration transforms raw sonar data into actionable intelligence, providing valuable insights into fish location, bottom composition, and underwater structures. This enhanced understanding of the underwater environment informs strategic decisions regarding lure selection, retrieval techniques, and fishing location, ultimately contributing to increased fishing success. Neglecting display setup can limit the effectiveness of the entire fish finder system, underscoring the importance of this component in maximizing the benefits of adding a fish finder to a kayak. Therefore, careful attention to display setup, coupled with an understanding of its impact on data interpretation, represents a critical step in leveraging fish finder technology for a more productive and rewarding kayak fishing experience.
Frequently Asked Questions
Addressing common queries regarding kayak fish finder integration clarifies key considerations and facilitates informed decision-making.
Question 1: What type of transducer is most suitable for kayak fishing?
Transducer selection depends on several factors, including kayak type, fishing environment, and target species. In-hull transducers offer protection and streamlined performance, while transom-mount transducers provide versatility. Scupper-mount transducers offer a compromise between the two. Careful consideration of these factors ensures optimal performance.
Question 2: How is a kayak fish finder powered?
Kayak fish finders are typically powered by 12V batteries. Options include dedicated marine batteries, portable power packs, or kayak-specific power systems. Battery choice depends on factors such as trip duration, power consumption, and portability requirements.
Question 3: Can a fish finder be installed on any kayak?
While fish finders can be installed on most kayaks, certain considerations apply. Kayak size and design influence transducer placement and wiring options. Compatibility between the fish finder system and the kayak’s electrical system must also be considered.
Question 4: What is the average cost of adding a fish finder to a kayak?
The cost varies depending on fish finder model, transducer type, and installation complexity. Basic setups can range from a few hundred dollars to more elaborate systems exceeding a thousand dollars. Budget considerations should align with desired features and performance expectations.
Question 5: How does transducer frequency affect fish finding capabilities?
Higher frequencies (e.g., 200 kHz) offer greater detail in shallower water, while lower frequencies (e.g., 83 kHz) provide better depth penetration. Dual-frequency transducers offer versatility across various depths and fishing scenarios.
Question 6: Is professional installation necessary for a kayak fish finder?
While professional installation ensures expertise, many anglers successfully install fish finders themselves. Following manufacturer instructions and utilizing appropriate tools and materials typically suffice for competent DIY installation.
Careful consideration of these frequently asked questions empowers kayak anglers to make informed decisions, ensuring successful integration of fish finder technology and enhancing the overall fishing experience.
Moving forward, practical tips and real-world examples will further illustrate effective utilization of fish finders in kayak fishing scenarios.
Adding a Fish Finder to a Kayak
Equipping a kayak with a fish finder represents a significant advancement in angling technology, transforming a simple vessel into a sophisticated platform for locating and targeting fish. Careful consideration of transducer selection, power supply, display setup, and installation techniques ensures optimal performance and maximizes the benefits of this technology. Understanding the nuances of each component and their interplay contributes to a more informed and effective approach to kayak fishing. From transducer frequencies and cone angles to display customization and power management, each aspect plays a crucial role in optimizing the system for specific fishing environments and target species.
The integration of electronics into kayak fishing underscores the continuous evolution of angling practices. As technology advances, further refinements in fish finding capabilities promise to enhance the experience and success of kayak anglers. Embracing these advancements, while respecting the fundamental principles of angling and conservation, ensures the continued enjoyment and sustainability of this evolving sport. The ability to interpret and utilize the data provided by a fish finder empowers anglers to make more informed decisions, leading to not only increased catches but also a deeper understanding of the underwater environment and the behavior of fish.


