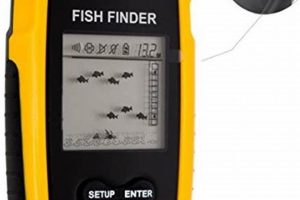
Equipping a kayak with sonar technology involves several key steps, from selecting the right device and power source to mounting the transducer and display unit effectively. A typical installation includes mounting the transducer inside the hull, on the transom, or through-hull, and securing the display unit within easy reach of the paddler. Power is commonly supplied by a portable, rechargeable 12-volt battery.
Enhanced angling success often stems from understanding underwater terrain and fish location. Kayak anglers gain a significant advantage through this technology, enabling them to identify promising fishing spots, track fish movement, and understand bottom structure. This capability is particularly valuable in challenging conditions or unfamiliar waters, ultimately contributing to a more productive and enjoyable fishing experience. The evolution of portable electronics has made this once-complex setup increasingly accessible and user-friendly for kayak anglers.
The following sections will delve into the specifics of choosing the right equipment, various mounting techniques for different kayak types, power management solutions, and tips for optimal setup and utilization.
Tips for Installing a Kayak Fish Finder
Proper installation is crucial for optimal performance and longevity of electronic fish-finding equipment in a kayak environment. Attention to detail during the setup process can prevent issues and ensure reliable operation on the water.
Tip 1: Transducer Placement: Careful transducer placement is paramount for accurate readings. Avoid areas of turbulence or interference from hull fittings. Inside-hull mounting offers protection but may slightly reduce sensitivity. Transom mounting provides good performance on most kayaks, while through-hull installations offer the best sensitivity but require more invasive modifications.
Tip 2: Cable Management: Securely route cables to prevent tangling and damage. Utilize cable ties or clips to keep wiring organized and away from moving parts or potential snags. Protect exposed wiring from UV exposure and water intrusion where possible.
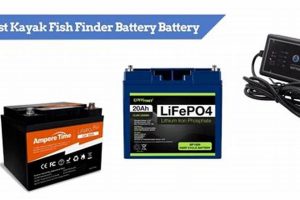
Tip 3: Power Source Considerations: Choose a battery with sufficient capacity to power the fish finder for the duration of intended fishing trips. Consider factors such as screen brightness and sonar frequency when estimating power consumption. Carry a spare battery for extended outings.
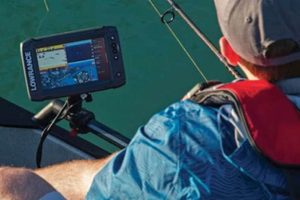
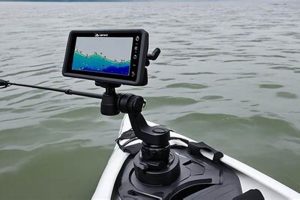
Tip 4: Display Mounting: Position the display unit within easy view and reach for comfortable operation. Ensure the mounting location provides adequate protection from glare and splashing water. Consider using a RAM mount or similar adjustable system for flexibility.
Tip 5: Waterproofing: Ensure all connections and exposed electronics are adequately waterproofed to prevent damage from rain or submersion. Use marine-grade sealant or waterproof connectors to protect vulnerable components.
Tip 6: Testing and Calibration: Test the fish finder in shallow water before venturing into deeper areas. Verify accurate depth readings and sonar functionality. Calibrate the device as needed for optimal performance in specific water conditions.
Tip 7: Interference Considerations: Be mindful of potential interference from other electronic devices on the kayak, such as trolling motors or other fish finders. Maintain adequate separation between devices to minimize signal disruption.
Adherence to these guidelines will enhance the effectiveness of the fish finder system, contributing to a more successful and informed angling experience.
By following these tips, anglers can ensure a reliable and effective fish-finding setup, leading to a more productive time on the water. The subsequent conclusion summarizes the key benefits and considerations discussed.
1. Planning
Effective planning forms the cornerstone of a successful fish finder installation on a kayak. Careful consideration of several factors during the planning phase significantly influences the overall effectiveness and longevity of the system. Key planning elements include kayak compatibility, fish finder selection, mounting location considerations, power source determination, and cable routing strategies. A well-defined plan mitigates potential installation challenges and ensures optimal performance. For instance, assessing kayak hull characteristics informs transducer selection and mounting method. Compatibility between the fish finder model and chosen power source prevents operational issues. Pre-planning cable routes minimizes clutter and potential damage.
Analyzing specific scenarios underscores the practical significance of planning. In a sit-on-top kayak, planning might involve selecting a transom-mount transducer and routing cables internally to protect them from the elements. Conversely, a sit-inside kayak might necessitate an inside-hull transducer placement and a different cable management approach. Power source planning considers factors like battery capacity, weight, and mounting location. Anticipating these aspects during the planning phase prevents compatibility issues and ensures sufficient power for the duration of fishing trips. Choosing between a portable, rechargeable battery and a dedicated wiring setup connected to the kayak’s electrical system (if available) is a crucial decision made during planning.
In conclusion, thorough planning streamlines the installation process and ensures a functional and durable fish finder setup. Addressing potential challenges preemptively through careful planning optimizes performance and minimizes disruptions during on-water operation. This proactive approach maximizes the benefits of incorporating fish-finding technology into the kayak fishing experience. Neglecting planning often leads to suboptimal performance, equipment damage, or operational difficulties. A well-defined plan translates directly into improved angling efficiency and enjoyment on the water.
2. Mounting
Secure and appropriate mounting of fish finder components is essential for optimal performance and longevity in the demanding kayak environment. Mounting directly influences the accuracy of readings, the safety of equipment, and the overall user experience. Incorrect mounting can lead to inaccurate readings, damaged equipment, and potential safety hazards.
- Transducer Mounting
The transducer, responsible for sending and receiving sonar signals, requires careful placement to ensure accurate readings. Common mounting locations include inside the hull, on the transom, or through the hull. Each method presents unique benefits and drawbacks. Inside-hull mounting offers simplicity and protection but may slightly reduce sensitivity. Transom mounting provides a balance of performance and ease of installation. Through-hull mounting offers the highest sensitivity but requires more complex installation. Selection depends on hull material, kayak design, and desired performance level. For example, a kayak with a stepped hull may necessitate a transom-mount transducer to avoid interference. Conversely, a smooth, flat-bottomed hull might be suitable for inside-hull mounting.
- Display Unit Mounting
The display unit requires positioning within easy view and reach of the paddler. Various mounting systems, such as RAM mounts or specialized kayak-specific mounts, provide flexibility and stability. Ensuring the display is readily visible and accessible enhances situational awareness and operational efficiency. Placement considerations include glare reduction, protection from water spray, and minimizing interference with paddling. For example, mounting the display unit on a swivel arm allows for adjustments based on sun position and paddling posture.
- Battery Mounting
Securing the power source, typically a 12-volt battery, requires careful consideration of weight distribution and accessibility. Placement influences kayak stability and ease of battery replacement. Options include dedicated battery boxes, straps, or integrated mounting systems within the kayak. Proper mounting prevents battery movement during paddling and minimizes potential damage. A centrally located battery helps maintain balanced weight distribution, while easy access facilitates quick changes or charging.
- Cable Management
Effective cable management is crucial for both functionality and aesthetics. Securing cables prevents tangling, damage, and interference with paddling. Utilizing cable ties, clips, and protective tubing maintains a clean and organized setup, reducing the risk of snags and ensuring long-term reliability. Routing cables through internal channels or along the underside of the deck minimizes exposure to the elements and reduces the risk of accidental damage.
Careful consideration of these mounting aspects contributes significantly to the overall success and enjoyment of kayak fishing with a fish finder. Secure and properly positioned components ensure accurate readings, prevent equipment damage, and enhance the angler’s ability to effectively utilize the technology. The interplay of these factors contributes to a seamless integration of electronics and vessel, maximizing the benefits of enhanced fish-finding capabilities. For example, a poorly mounted transducer might provide erratic readings, hindering accurate fish location. Conversely, a securely mounted and strategically placed display unit facilitates quick interpretation of data, allowing for timely adjustments in fishing strategy. Therefore, meticulous attention to mounting details ultimately translates to improved angling efficiency and a more rewarding experience on the water.
3. Wiring
Proper wiring is a critical aspect of installing a fish finder on a kayak, directly impacting the system’s performance and longevity. A well-executed wiring setup ensures reliable power delivery to the fish finder and transducer, minimizing signal interference and maximizing operational efficiency. Conversely, inadequate wiring can lead to intermittent power loss, inaccurate readings, and potential damage to the electronic components. Careful consideration of wire type, gauge, routing, and connection methods contributes to a robust and dependable system.
Selecting marine-grade tinned copper wire is crucial for its corrosion resistance in harsh marine environments. Choosing an appropriate wire gauge ensures sufficient current delivery to the fish finder without excessive voltage drop. For example, longer cable runs may require a heavier gauge wire to minimize power loss. Proper routing protects the wiring from abrasion, UV exposure, and potential entanglement with other kayak gear. Securing cables with cable ties or clips maintains a clean and organized setup, reducing the risk of damage and ensuring reliable long-term operation. Employing waterproof connectors and sealant further safeguards the system from water intrusion, a common cause of fish finder malfunctions. For instance, using heat shrink tubing over connections adds an extra layer of protection against moisture and corrosion.
Understanding the wiring diagram provided with the specific fish finder model is essential for correct installation. Connecting the power leads to the battery with appropriate inline fuses protects both the fish finder and the kayak’s electrical system. Correctly connecting the transducer cable to the display unit ensures accurate sonar readings. Testing the wiring connections before deployment is crucial for verifying proper functionality and identifying potential issues. A systematic approach to wiring, combined with careful component selection and routing, ensures a robust and dependable fish finder system for enhanced angling performance. Neglecting proper wiring practices compromises the functionality and reliability of the fish finder, potentially leading to frustrating malfunctions and a diminished fishing experience. Meticulous attention to wiring details, therefore, contributes directly to the overall success and enjoyment of kayak fishing with enhanced electronic capabilities.
4. Powering
Reliable power delivery is fundamental to the operation of a fish finder on a kayak. The chosen power source directly impacts the system’s functionality, runtime, and overall effectiveness. Understanding power requirements, battery options, and wiring considerations ensures consistent performance and a positive user experience. An inadequate power supply can lead to interruptions, inaccurate readings, and ultimately, a compromised fishing trip. Careful consideration of these factors ensures uninterrupted operation and maximizes the benefits of utilizing fish-finding technology.
- Battery Selection
Battery selection hinges on several factors, including fish finder power consumption, anticipated usage duration, and portability requirements. Common options include sealed lead-acid (SLA) batteries and lithium-ion batteries. SLA batteries offer affordability and reliability but are heavier than lithium-ion alternatives. Lithium-ion batteries provide higher energy density for longer runtimes with lighter weight, but come at a premium cost. Capacity, measured in Ampere-hours (Ah), dictates the duration of operation. Choosing a battery with sufficient capacity ensures uninterrupted performance throughout the fishing trip. A higher Ah rating generally translates to longer runtime. For instance, a fish finder with a higher power draw may require a larger capacity battery for extended use. Calculating expected power consumption based on the fish finder’s specifications and intended usage time aids in selecting the appropriate battery capacity.
- Power Consumption Management
Optimizing power consumption extends battery life and minimizes the need for frequent recharging or replacements. Adjusting screen brightness, utilizing power-saving modes, and powering down the unit when not actively fishing can significantly prolong battery life. Understanding the power consumption characteristics of the specific fish finder model enables effective power management strategies. For example, reducing screen brightness during daylight hours or activating power-saving features can conserve battery power without significantly impacting functionality. Regularly checking battery charge levels ensures adequate power reserves for the duration of the fishing trip.
- Wiring and Connections
Proper wiring and secure connections are crucial for efficient power delivery and system longevity. Using marine-grade tinned copper wire with appropriate gauge prevents voltage drop and corrosion. Employing waterproof connectors and sealant safeguards the electrical system from water damage. Correctly connecting the power leads to the battery terminals with appropriate inline fuses protects both the fish finder and the kayak. For example, using ring terminals at battery connections ensures a secure and reliable connection, minimizing the risk of power loss or damage due to vibration or movement. Periodically inspecting wiring and connections for signs of wear or corrosion helps maintain reliable operation and prevents potential malfunctions.
- Charging and Maintenance
Proper charging and maintenance practices prolong battery life and ensure reliable performance. Following manufacturer recommendations for charging procedures prevents battery damage and maximizes lifespan. Storing batteries in a cool, dry place away from direct sunlight extends their useful life. Periodically checking battery water levels (for SLA batteries) and performing capacity tests helps maintain optimal performance and identify potential issues before they impact on-water operation. Proper disposal of old or damaged batteries adheres to environmental guidelines and prevents potential hazards.
Effective power management is integral to successfully integrating a fish finder into a kayak fishing setup. A reliable power source, combined with efficient power consumption practices, ensures consistent fish finder performance, enhancing the overall fishing experience. Understanding the interplay of these factors optimizes functionality, extends battery life, and minimizes potential disruptions during on-water operation. Neglecting power-related aspects can lead to malfunctions, inaccurate readings, and a diminished fishing experience. Therefore, meticulous attention to power management contributes significantly to a successful and enjoyable kayak fishing adventure. Proper planning and execution of power-related aspects ultimately translate to a more productive and rewarding time on the water.
5. Testing
Thorough testing validates the functionality and effectiveness of a kayak fish finder installation. Verification of proper operation before deployment on the water prevents potential disruptions and ensures optimal performance during fishing trips. Testing confirms accurate readings, identifies potential issues, and allows for adjustments prior to actual use, maximizing the benefits of the technology and contributing to a more successful angling experience. Neglecting testing can lead to undetected malfunctions, inaccurate data interpretation, and a compromised fishing outing.
- Initial Power-On Test
An initial power-on test verifies basic functionality and identifies any immediate connection or power supply issues. This involves powering on the fish finder and checking for display illumination, proper startup sequences, and responsiveness to user input. Successful completion of this test confirms basic operability and allows for further testing procedures. For example, observing a blank screen or unusual error messages during the initial power-on test indicates potential wiring problems or display unit malfunctions. Addressing these issues early prevents frustration and wasted time on the water.
- Simulator Mode Test
Utilizing the simulator mode (if available) allows assessment of various functions without being on the water. Simulator mode mimics real-world sonar readings, enabling verification of depth readings, fish identification capabilities, and other features. This provides a controlled environment for familiarization with the fish finder’s operation and confirms accurate interpretation of displayed information. For instance, practicing with the simulator mode allows anglers to recognize different bottom structures, fish arches, and other relevant data displayed by the fish finder, improving their ability to interpret real-time readings on the water. This pre-trip practice enhances understanding of the system’s capabilities and improves real-world interpretation accuracy.
- Shallow Water Test
Testing in shallow, controlled water confirms accurate depth readings and transducer performance. Comparing the fish finder’s depth readings to known depths verifies proper transducer installation and calibration. Observing bottom structure and potential fish targets in shallow water further confirms sonar functionality and provides a practical understanding of real-world data interpretation. This test also allows for fine-tuning transducer position or sensitivity settings for optimal performance in specific water conditions. For example, if the depth readings in shallow water significantly deviate from known depths, it indicates a potential issue with transducer placement or calibration. Adjusting the transducer position or recalibrating the fish finder addresses these discrepancies and ensures accurate depth readings in various fishing environments.
- Open Water Test
Final testing in open water under typical fishing conditions confirms overall system functionality and integration with the kayak. This test allows for assessment of fish finder performance while paddling, evaluating the stability of mounting systems, and identifying any interference or noise issues. Observing real-time sonar readings in deeper water and varying bottom conditions provides valuable insights into fish behavior and underwater structures. This comprehensive test ensures the system is fully operational and ready for effective use in actual fishing scenarios. For instance, if the fish finder display exhibits excessive interference or erratic readings while paddling, it may indicate a wiring issue, interference from other electronic devices, or a need for further adjustment of transducer sensitivity. Addressing these issues prior to serious fishing excursions optimizes performance and maximizes the benefits of the technology.
Systematic testing ensures reliable fish finder operation, contributing significantly to a successful kayak fishing experience. Validating functionality through these progressive testing stages identifies and addresses potential issues before they disrupt on-water operation. Thorough testing, therefore, directly translates to increased confidence in the technology, improved data interpretation, and ultimately, a more productive and enjoyable fishing adventure. This proactive approach maximizes the advantages of incorporating fish-finding technology into the kayak fishing experience, enabling informed decisions, efficient fish location, and increased chances of angling success. A well-tested system empowers anglers with the knowledge and confidence needed to effectively utilize their fish finders, leading to a more fulfilling and successful time on the water.
Frequently Asked Questions
This section addresses common inquiries regarding kayak fish finder installations, providing concise and informative responses to facilitate informed decision-making and successful implementation.
Question 1: What type of fish finder is best suited for kayak fishing?
Selection depends on individual needs and budget. Compact, portable units with GPS and sonar capabilities are generally preferred. Consider display size, target species, and desired features like mapping and down-scanning imaging when selecting a model.
Question 2: Can a fish finder be installed on any type of kayak?
Installation is possible on most kayak types, including sit-on-top and sit-inside models. Specific mounting methods may vary depending on hull design and material. Careful consideration of transducer placement and cable routing ensures optimal performance and minimizes interference.
Question 3: What is the most effective transducer mounting method for a kayak?
Optimal mounting depends on kayak design and desired performance. Inside-hull mounting offers convenience but may slightly reduce sensitivity. Transom mounting provides a balance of performance and ease of installation. Through-hull mounting offers the highest sensitivity but requires more complex installation.
Question 4: How long does a fish finder battery typically last on a kayak?
Battery life depends on capacity, fish finder power consumption, and usage patterns. Lithium-ion batteries generally offer longer runtimes than sealed lead-acid batteries. Power management techniques like adjusting screen brightness and utilizing power-saving modes can extend battery life.
Question 5: Is it necessary to use marine-grade wiring for a kayak fish finder installation?
Utilizing marine-grade tinned copper wire is strongly recommended. Marine-grade wiring resists corrosion in harsh marine environments, ensuring long-term reliability and preventing potential electrical issues. Proper wire gauge selection ensures sufficient current delivery to the fish finder.
Question 6: How can interference be minimized in a kayak fish finder setup?
Careful cable routing and proper grounding techniques minimize interference. Keeping transducer cables separate from power cables and other electronic devices reduces the risk of signal disruption. Consult the fish finder’s manual for specific grounding instructions to further mitigate potential interference.
Addressing these common inquiries provides a foundation for successful kayak fish finder installation and operation. Careful consideration of these aspects contributes to a more informed and productive fishing experience.
The following conclusion summarizes key takeaways and offers final recommendations for anglers seeking to enhance their kayak fishing experience through the integration of fish-finding technology.
Conclusion
Equipping a kayak with a fish finder offers significant advantages for anglers seeking to improve their success on the water. Successful integration hinges on careful planning, proper equipment selection, and meticulous attention to mounting, wiring, and powering details. Strategic transducer placement, secure display unit mounting, and efficient cable management contribute to accurate readings and reliable operation. Understanding power requirements and implementing effective power management strategies ensure uninterrupted functionality throughout the fishing trip. Thorough testing and calibration validate system performance and allow for adjustments prior to actual use. Addressing potential interference and utilizing appropriate wiring practices further enhance reliability and data accuracy.
Strategic use of this technology empowers anglers to make informed decisions, locate fish more efficiently, and gain a deeper understanding of underwater environments. The ability to interpret sonar data and correlate it with observed conditions significantly enhances angling prowess, leading to a more productive and rewarding experience. Continued advancements in fish finder technology promise even greater capabilities and further integration with other electronic tools, offering exciting prospects for the future of kayak fishing.


