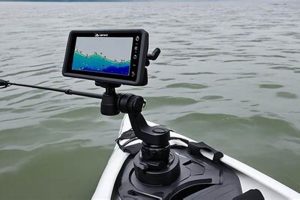
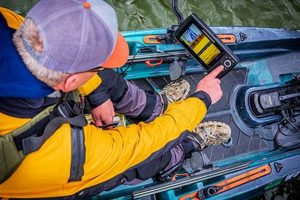
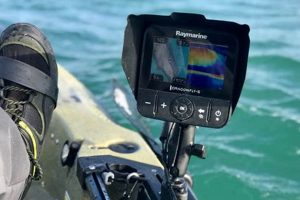
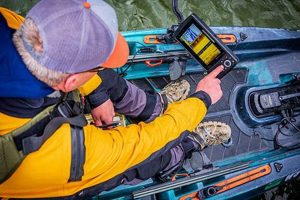
Equipping a kayak with sonar technology involves several key considerations, including transducer placement, power supply management, and display unit positioning. For example, the transducer, responsible for sending and receiving sonar signals, can be mounted inside the hull, through-hull, or on a retractable arm. Each approach offers advantages and disadvantages concerning signal clarity, ease of use, and impact on kayak performance.
Accurate underwater readings contribute significantly to angling success from a kayak. Understanding depth contours, locating structures, and identifying fish concentrations provides anglers with a critical advantage. Historically, anglers relied solely on intuition and experience; however, modern electronics substantially enhance the ability to pinpoint fish-holding areas, thus improving efficiency and catch rates. This ultimately allows for a more informed and effective angling experience.
Several factors influence the optimal setup for integrating sonar equipment. These factors include the type of kayak, the intended fishing environment, user preferences, and the specific features of the chosen fish finder. Subsequent sections will explore these considerations in detail, offering practical guidance on power sources, wiring strategies, and mounting techniques.
Tips for Kayak Fish Finder Installation
Careful planning and execution are crucial for a successful fish finder installation. These tips offer practical guidance for achieving optimal performance and a streamlined setup.
Tip 1: Transducer Placement Matters: Consider the kayak’s hull material and shape. Inside-hull mounting offers simplicity but may sacrifice some signal clarity. Through-hull transducers provide the best performance but require more invasive installation. Retractable arm mounts offer flexibility and portability.
Tip 2: Power Source Selection: Choose a suitable battery to power the fish finder. Consider the fish finder’s power requirements and the anticipated duration of fishing trips. Seal and secure the battery in a waterproof compartment.
Tip 3: Cable Management is Essential: Securely route and fasten all cables to prevent tangling and interference. Use cable ties or clips to keep wiring organized and protected from the elements.
Tip 4: Display Placement for Optimal Viewing: Position the display unit within easy reach and sight. Consider mounting options that allow for adjustments based on seating position and sunlight conditions.
Tip 5: Waterproofing is Paramount: Ensure all connections and components are adequately sealed to prevent water damage. Use marine-grade sealant and waterproof connectors for maximum protection.
Tip 6: Test Before You Go: Before hitting the water, thoroughly test the entire system. Verify proper operation of the fish finder and ensure all connections are secure.
Tip 7: Consider a Portable Kit: For occasional use or multiple kayaks, a portable fish finder kit offers convenient setup and removal. These kits typically include a carrying case and all necessary mounting hardware.
Following these tips will ensure a reliable and effective fish finder setup, maximizing angling success and enhancing the overall kayaking experience. This careful preparation allows anglers to focus on the task at hand, equipped with the necessary tools to locate fish effectively.
By understanding the nuances of installation and utilizing the appropriate techniques, anglers can effectively integrate electronics into their kayak fishing experience.
1. Transducer Placement
Optimal transducer placement is paramount for effective fish finder operation on a kayak. The transducer, responsible for transmitting and receiving sonar signals, requires careful positioning to ensure accurate readings and maximize performance. Various mounting locations offer distinct advantages and disadvantages, influencing signal quality, ease of installation, and overall user experience.
- Inside-Hull Mounting
This method involves placing the transducer inside the kayak’s hull, typically adhered with epoxy. Inside-hull mounting offers ease of installation and protection from impact. However, signal strength may be slightly reduced due to the hull material. This method is best suited for smooth, fiberglass hulls and calmer waters.
- Through-Hull Mounting
Through-hull mounting involves drilling a hole in the kayak’s hull and inserting the transducer. This method provides the clearest sonar readings due to direct contact with the water. However, it requires more invasive installation and careful sealing to prevent leaks. This approach is often favored by anglers seeking optimal performance in various water conditions.
- Transom Mounting
This involves attaching the transducer to the kayak’s stern. Transom mounting is relatively simple to install and suitable for kayaks with a flat transom area. However, turbulence from the propeller or paddle strokes can sometimes interfere with sonar readings, and the transducer is more exposed to potential damage.
- Retractable Arm Mounting
A retractable arm allows for easy deployment and retrieval of the transducer. This method offers flexibility for adjusting transducer depth and protecting it during transport. While convenient, arm mounts can be susceptible to vibration, potentially affecting sonar readings.
Selecting the appropriate transducer mounting location depends on factors such as hull material and shape, fishing environment, and desired performance level. Careful consideration of these elements ensures optimal sonar readings, enhancing the overall effectiveness of the fish finder system on the kayak. The chosen mounting method directly impacts the quality of data received, informing angling decisions and contributing to overall success on the water.
2. Power Source
Power source selection significantly impacts the functionality and longevity of kayak-mounted fish finders. These electronic devices require a stable and reliable power supply for optimal performance. The choice of power source directly influences operational duration, mounting considerations, and overall system efficiency. Battery capacity, type, and placement are critical factors in ensuring uninterrupted operation during fishing expeditions. For example, a 12V deep-cycle marine battery provides ample power for extended use, while smaller, lighter batteries offer portability for shorter trips. The power source’s capacity must align with the fish finder’s power draw to avoid premature depletion. Incorrectly matching power supply and device requirements can lead to reduced fish finder performance or even system failure.
Mounting a fish finder necessitates careful consideration of power source integration. The battery must be securely positioned within the kayak to prevent shifting during movement. Waterproof battery boxes offer protection from the elements and prevent accidental short circuits. Wiring must be carefully routed and secured to avoid tangling and potential damage. Fused connections safeguard the system from power surges. Properly integrating the power source into the mounting setup is crucial for maintaining a clean and functional kayak environment. A poorly integrated power supply can hinder access to other equipment or create safety hazards. Practical considerations, such as ease of access for battery replacement or charging, contribute to a more user-friendly setup.
Understanding the interplay between power source and fish finder mounting ensures reliable operation and maximizes angling effectiveness. Choosing an appropriate battery and integrating it seamlessly into the kayak setup are crucial steps in creating a functional and efficient fishing platform. Challenges such as limited space and the need for waterproofing require careful planning and execution. A well-planned power system allows anglers to focus on fishing, confident in the reliability of their electronic tools. Addressing these considerations during the mounting process ensures a safe, efficient, and enjoyable kayaking experience.
3. Cable Management
Effective cable management is essential for a successful fish finder installation on a kayak. Proper routing and securing of cables not only contribute to a clean and organized setup but also prevent potential interference with the fish finder’s operation and protect the wiring from damage. Unsecured cables can become tangled, potentially impacting sonar readings or creating safety hazards. A systematic approach to cable management ensures a functional and efficient fishing platform.
- Securing Cables
Cables should be securely fastened to the kayak using cable ties, clips, or adhesive mounts. This prevents them from dangling freely and becoming entangled with fishing gear or other equipment. Securing cables also minimizes the risk of damage from abrasion or impact. For example, routing cables along the underside of deck lines or through dedicated channels protects them from direct exposure to the elements and reduces the likelihood of snags. Proper securing methods contribute to a streamlined and professional-looking installation.
- Protecting Connections
Waterproof connectors and marine-grade sealant protect exposed connections from water damage and corrosion. These measures are crucial for maintaining the integrity of the electrical system and ensuring the long-term reliability of the fish finder. For instance, applying sealant to exposed wire ends and using waterproof electrical tape provides an additional layer of protection against moisture and the elements. Properly protected connections contribute to the longevity of the fish finder system.
- Routing Strategies
Strategic cable routing minimizes interference and optimizes cable length. Running cables away from the transducer and other electronic devices helps prevent signal interference. Avoiding excessive cable length reduces the risk of tangles and voltage drop. For example, planning cable routes before installation allows for efficient placement and minimizes the need for splices or extensions. Careful routing ensures optimal fish finder performance and a clean installation.
- Accessibility for Maintenance
While maintaining a clean and organized appearance is important, cable routing should also allow for easy access to connections and components for maintenance or troubleshooting. Avoid routing cables in areas that are difficult to reach or inspect. For example, using labeled connectors and providing enough slack in the wiring simplifies future maintenance tasks. Accessible wiring facilitates troubleshooting and system upgrades.
These cable management practices contribute significantly to the overall success of a fish finder installation on a kayak. A well-organized and protected wiring system ensures reliable operation, minimizes interference, and enhances the longevity of the equipment. Careful consideration of cable routing, securing methods, and connection protection contributes to a safe, functional, and aesthetically pleasing installation, ultimately enhancing the angling experience. By addressing these considerations, anglers can create a streamlined and efficient setup, allowing them to focus on locating fish rather than troubleshooting technical issues.
4. Display Positioning
Display positioning plays a crucial role in the effective utilization of a kayak-mounted fish finder. Optimal visibility and accessibility are paramount for interpreting sonar data and making informed angling decisions. Placement considerations must account for the kayak’s design, angler posture, and potential environmental factors like glare and spray. An improperly positioned display can hinder an angler’s ability to react quickly to underwater conditions, potentially impacting fishing success. For instance, a display mounted too low might require excessive bending, causing discomfort and obstructing the view of the surrounding water. Conversely, a display positioned too high can create glare issues in direct sunlight, making it difficult to read crucial information.
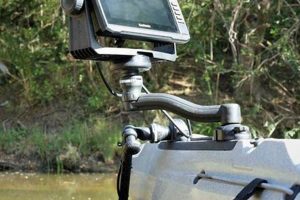
Several factors influence optimal display placement. Kayak design dictates available mounting locations and viewing angles. Sit-on-top kayaks typically offer more flexibility than sit-inside models due to their open decks. Angler posture also plays a significant role; the display should be easily viewable without requiring significant movement or strain. Furthermore, environmental considerations, such as prevalent sunlight direction and potential water spray, should inform placement decisions. Mounting the display at an angle can mitigate glare, while positioning it in a protected area shields it from spray. Some anglers utilize adjustable mounts to accommodate varying conditions and preferences. These mounts allow for quick adjustments to optimize viewing angles based on lighting, water conditions, or changes in fishing technique. Practical examples include utilizing RAM mounts or Scotty mounts, which provide flexibility and secure attachment options tailored for kayak environments.
Strategic display positioning optimizes the functionality of the fish finder, contributing directly to angling efficiency and enjoyment. Careful consideration of kayak design, angler posture, and environmental influences ensures that the display remains easily readable and accessible throughout the fishing trip. Addressing potential challenges such as glare, spray, and limited mounting space ultimately leads to a more comfortable and productive angling experience. A well-positioned display allows anglers to focus on interpreting sonar data and reacting to underwater conditions without the distraction of an awkwardly placed or difficult-to-read screen. This focused approach enhances the overall angling experience by facilitating informed decisions and optimizing the use of valuable fishing time.
5. Secure Mounting
Secure mounting is a critical aspect of successfully integrating a fish finder onto a kayak. The dynamic nature of kayaking, with its inherent movement and exposure to the elements, necessitates a robust and reliable mounting system. A secure mount prevents damage to the fish finder unit and ensures consistent, accurate readings by minimizing vibration and maintaining transducer position. Failure to securely mount components can lead to equipment loss, inaccurate readings due to transducer displacement, and potential safety hazards from loose equipment in the kayak. For example, a loosely mounted transducer may provide erratic depth readings or fail to accurately track bottom contours, hindering navigation and fish identification. Similarly, a poorly secured display unit can detach during paddling or in rough water, resulting in costly equipment loss.
Several factors contribute to secure mounting. Utilizing appropriate mounting hardware specifically designed for marine environments is essential. This includes corrosion-resistant screws, bolts, and mounting plates that can withstand prolonged exposure to water and sunlight. Choosing mounting locations that offer structural integrity is equally important. Flat, stable surfaces provide a more secure base compared to curved or uneven areas. Reinforcing mounting points with backing plates distributes stress and enhances stability, especially in kayaks constructed from thinner materials. Furthermore, regular inspection and maintenance of the mounting system are essential for long-term reliability. Tightening loose screws and checking for signs of wear or damage can prevent potential issues on the water. Practical examples include using RAM mounts or Scotty mounts, known for their durability and adjustability in kayak applications. These mounting systems often employ multiple points of contact and locking mechanisms to ensure a secure hold even in challenging conditions.
A secure mounting system is fundamental to the long-term functionality and safety of a kayak-mounted fish finder. It safeguards the investment in electronic equipment and ensures consistent, reliable performance. Addressing the challenges posed by the dynamic kayak environment through proper hardware selection, strategic mounting location choices, and regular maintenance contributes significantly to a more productive and enjoyable fishing experience. By prioritizing secure mounting, anglers can focus on interpreting sonar data and enjoying the sport without the distraction and potential risks associated with unstable equipment. This attention to detail contributes to a more efficient and ultimately more rewarding time on the water.
6. Weatherproofing
Weatherproofing is paramount when mounting electronic devices, such as fish finders, on kayaks. Kayaks operate in inherently wet environments, exposing electronics to rain, spray, and even submersion. Proper weatherproofing safeguards these devices from moisture damage, ensuring functionality and longevity. Neglecting weatherproofing measures can lead to corrosion, short circuits, and ultimately, device failure. For example, exposed connections can corrode over time, leading to intermittent signal loss or complete system malfunction. A sudden downpour or an unexpected wave can introduce water into unprotected components, potentially causing irreparable damage. Therefore, integrating robust weatherproofing practices is essential for maintaining the reliability and extending the lifespan of electronic equipment in kayaking applications.
Several practical steps contribute to effective weatherproofing. Utilizing marine-grade sealant at all cable entry points and exposed connections prevents water intrusion. Choosing waterproof connectors and enclosures for sensitive components adds an additional layer of protection. Positioning the fish finder display and other electronic components in areas less susceptible to direct spray or splashing further mitigates water exposure. Furthermore, regularly inspecting and maintaining seals and connections ensures ongoing protection. Over time, sealant can degrade or become dislodged, creating vulnerabilities. Diligent maintenance, such as reapplying sealant as needed, safeguards against potential water damage. Examples of effective weatherproofing products include marine-grade silicone sealant, waterproof heat shrink tubing, and specialized waterproof enclosures for batteries and other sensitive electronics. These products, when properly applied, create a robust barrier against the elements.
In conclusion, robust weatherproofing is not merely a recommended practice but a critical requirement for maintaining the functionality and longevity of kayak-mounted electronics like fish finders. The harsh marine environment necessitates proactive measures to protect sensitive equipment from moisture damage. Diligent application of appropriate sealants, strategic component placement, and regular maintenance ensure reliable performance and prevent costly repairs or replacements. Effective weatherproofing, therefore, directly contributes to a safer, more productive, and ultimately more enjoyable kayaking experience by safeguarding essential electronic tools from the detrimental effects of water exposure. This careful attention to detail ultimately enhances the overall experience on the water by minimizing potential disruptions caused by equipment failure.
7. Kayak Compatibility
Kayak compatibility is a crucial factor influencing fish finder mounting strategies. Kayak design variations, including hull material, shape, and available mounting surfaces, directly impact the feasibility and effectiveness of different mounting techniques. Sit-on-top kayaks, with their open decks, generally offer greater flexibility for transducer placement and wiring compared to sit-inside kayaks. Hull material influences transducer selection; some transducers are better suited for fiberglass or composite hulls, while others perform optimally on plastic kayaks. Available mounting space on the kayak also dictates display unit placement and power source integration. For example, a kayak with limited deck space may necessitate a compact display unit and a smaller battery. Conversely, a larger kayak with ample storage allows for more versatile setups. Ignoring kayak compatibility can lead to mounting difficulties, suboptimal fish finder performance, and potential damage to the kayak’s structure.
Understanding the specific characteristics of the kayak is essential for selecting appropriate mounting hardware and techniques. A kayak with scupper holes may offer convenient through-hull transducer mounting options, while a kayak with a flat transom facilitates transom-mount transducer installation. The presence of pre-installed accessory tracks simplifies the mounting of display units and other components. For instance, some kayaks are equipped with tracks specifically designed for fish finder displays, eliminating the need for drilling or adhesive mounting. Analyzing kayak compatibility before purchasing a fish finder and mounting accessories prevents compatibility issues and ensures a seamless integration process. This careful consideration ultimately leads to a more functional and user-friendly setup.
Successful fish finder integration hinges on recognizing the interplay between kayak design and mounting requirements. Addressing kayak compatibility considerations ensures structural integrity, optimal equipment performance, and a streamlined user experience. Failure to acknowledge these factors can compromise the effectiveness of the fish finder system and potentially damage the kayak itself. Therefore, evaluating kayak compatibility is a crucial first step in the planning and execution of a successful fish finder installation. This meticulous approach ensures a secure, functional, and aesthetically pleasing outcome, enhancing the overall kayaking and fishing experience.
Frequently Asked Questions
Addressing common queries regarding fish finder installation on kayaks clarifies potential uncertainties and facilitates informed decision-making.
Question 1: What type of transducer is best suited for a kayak?
Transducer selection depends on factors such as kayak hull material and fishing environment. Through-hull transducers offer optimal performance but require more complex installation. Inside-hull transducers provide a simpler installation option but may sacrifice some signal clarity. Transom-mount transducers are suitable for kayaks with a flat transom, while retractable arm mounts offer versatility.
Question 2: How is a fish finder powered on a kayak?
Typically, a 12V deep-cycle marine battery powers kayak fish finders. Battery capacity should align with the fish finder’s power requirements and anticipated usage duration. Secure battery placement and weatherproof storage are essential.
Question 3: Where should the fish finder display be mounted?
Display placement should prioritize visibility and accessibility from the angler’s seated position. Consider glare, spray, and kayak design when choosing a mounting location. Adjustable mounts offer flexibility for optimal viewing angles.
Question 4: How can wiring be protected from water damage?
Employing marine-grade sealant at all cable entry points and connections is crucial. Waterproof connectors and routing cables away from potential water exposure further enhance protection. Regular inspection and maintenance of seals and connections are essential.
Question 5: What mounting hardware is recommended for kayak installations?
Corrosion-resistant stainless steel hardware specifically designed for marine environments is recommended. RAM mounts and Scotty mounts offer robust and adjustable options for securing fish finder components to kayaks.
Question 6: Can any fish finder be mounted on a kayak?
While many fish finders are suitable for kayak installation, consider factors like display size, power requirements, and transducer compatibility with the kayak’s hull material. Portable fish finder kits are often well-suited for kayak use due to their ease of installation and removal.
Careful consideration of these frequently asked questions facilitates informed decisions, maximizing the effectiveness and longevity of a kayak-mounted fish finder.
Further exploration of specific fish finder models and kayak types can provide tailored guidance for individual setups.
Conclusion
Successful integration of sonar technology onto a kayak requires careful consideration of several key factors. Transducer placement directly impacts data accuracy, influencing choices between in-hull, through-hull, transom, or retractable arm mounting methods. Power source selection and management are crucial for sustained operation, necessitating appropriate battery capacity and secure, weatherproof installation. Effective cable management ensures both functionality and longevity by protecting wiring and minimizing interference. Strategic display positioning prioritizes visibility and accessibility, enhancing real-time data interpretation. Secure mounting of all components is paramount for withstanding the dynamic kayak environment and preventing equipment damage or loss. Finally, comprehensive weatherproofing safeguards electronics from the inevitable exposure to moisture, ensuring reliable performance and extended lifespan. Kayak compatibility considerations, encompassing hull material, shape, and available mounting space, further refine mounting strategies for optimal system integration.
Strategic planning and meticulous execution are essential for maximizing the benefits of a kayak-mounted fish finder. Proper installation enhances angling effectiveness by providing real-time underwater insights, leading to informed decision-making and improved catch rates. Careful consideration of these factors contributes not only to a more productive fishing experience but also to the overall enjoyment and safety of kayak angling. This knowledge empowers anglers to confidently explore and understand the underwater world, transforming their time on the water into a more informed and rewarding pursuit.

