Equipping a kayak with sonar technology provides anglers with a significant advantage in locating fish and understanding underwater terrain. This involves securely mounting a transducer, the component that sends and receives sonar signals, to the kayak’s hull or using a portable, floating transducer. The display unit, showing the interpreted sonar data, is then mounted within easy reach of the kayaker. Different mounting methods and transducer types exist, each suited to specific kayak designs and fishing styles.
Enhanced fish-finding capabilities lead to increased angling success. Knowing the depth, bottom structure, and presence of fish allows for more strategic lure and bait placement. This technology has revolutionized kayak fishing, transforming it from a more passive activity to a highly targeted pursuit. Historically, kayak anglers relied primarily on intuition and knowledge of local waters. Modern electronics offer a real-time window into the underwater world, expanding opportunities for both novice and experienced anglers.
The following sections will delve into specific methods for transducer installation, including considerations for different hull types, power sources, and cable management. Guidance on choosing the right fish finder for individual needs, along with tips for effective sonar interpretation, will also be provided.
Tips for Kayak Fish Finder Installation
Proper installation ensures optimal fish finder performance and longevity. Attention to detail during the mounting process is crucial for a clean, functional setup.
Tip 1: Transducer Placement: Select a location that minimizes interference from the kayak’s hull and other underwater obstructions. Flat surfaces are ideal for optimal sonar cone dispersion.
Tip 2: Secure Mounting: Ensure the transducer is firmly attached to prevent movement or damage during use. Use appropriate adhesives, mounting brackets, or through-hull fittings as needed.
Tip 3: Cable Management: Route cables neatly and securely to prevent tangling and damage. Use cable ties or clips to keep wires organized and out of the way.
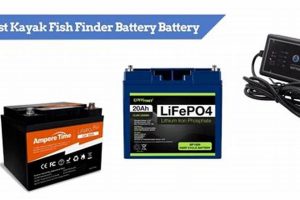
Tip 4: Power Source Considerations: Choose a reliable power source, such as a dedicated marine battery, to ensure consistent fish finder operation. Consider battery capacity and expected usage time.
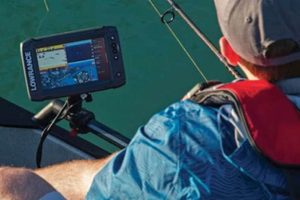
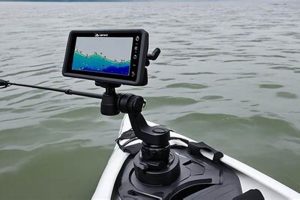
Tip 5: Display Unit Placement: Mount the display unit within easy view and reach for convenient operation and data interpretation while kayaking.
Tip 6: Waterproofing: Thoroughly seal any holes drilled in the kayak hull to prevent water intrusion. Use marine-grade sealant for long-lasting protection.
Tip 7: Testing and Calibration: Test the fish finder after installation to ensure proper function. Calibrate the unit according to the manufacturer’s instructions for accurate readings.
Careful planning and execution during the installation process will result in a reliable and effective fish-finding setup, enhancing angling experiences. A well-integrated system provides seamless access to critical underwater information, maximizing opportunities for success on the water.
By following these guidelines, anglers can confidently equip their kayaks with sonar technology, opening up a new dimension of underwater exploration and improved fishing outcomes. The subsequent section will provide further resources and troubleshooting tips.
1. Transducer Placement
Optimal transducer placement is paramount for maximizing the effectiveness of a kayak-mounted fish finder. The transducer’s position directly influences the quality of sonar readings and, consequently, the angler’s ability to locate fish and interpret underwater structures. Careful consideration of various factors is essential for achieving optimal performance.
- Inside Hull Mounting
This method involves placing the transducer inside the kayak’s hull, typically against the bottom. It offers a clean, protected installation, minimizing the risk of damage. Suitable for smooth, single-layer hulls, this approach simplifies installation but may slightly reduce sonar sensitivity compared to external mounting options. Examples include mounting inside sit-on-top kayaks with relatively flat hulls. However, effectiveness can be compromised by hull thickness or air bubbles trapped within a double-layered hull.
- External Hull Mounting
Mounting the transducer directly to the external hull provides optimal sonar signal transmission and reception. This method often involves specialized brackets or through-hull fittings. While maximizing performance, external mounting exposes the transducer to potential impact or damage. This approach is commonly used on various kayak types and can be adapted to different hull shapes. A transducer mounted on the transom, for instance, provides excellent performance in calm water but may experience interference in turbulent conditions.
- Trolling Motor Mounting
Integrating the transducer with a trolling motor allows for adjustable positioning and depth control. This approach offers flexibility for various fishing scenarios and water conditions. It requires a compatible trolling motor and transducer setup. For example, a transducer mounted on a trolling motor can be easily adjusted to avoid interference from weeds or surface chop, offering a dynamic advantage in challenging environments. However, the motor’s movement can introduce noise or turbulence affecting readings.
- Portable Mounting
Portable transducers, often deployed on floats or suction cups, offer versatility and easy installation. Ideal for temporary setups or rental kayaks, this option sacrifices some performance stability compared to permanent installations. A suction-cup mounted transducer, for instance, allows for quick deployment but may not be as stable in rough water or at higher speeds. This option is often chosen for its convenience and adaptability.
Selecting the appropriate transducer placement method depends on the specific kayak design, fishing style, and desired level of performance. Each approach presents unique advantages and limitations, influencing the quality and consistency of sonar readings. Understanding these factors is crucial for successfully integrating a fish finder into a kayak fishing system.
2. Secure Mounting
Secure mounting is a critical aspect of successfully integrating a fish finder onto a kayak. A stable transducer platform ensures consistent and accurate sonar readings, maximizing the effectiveness of the fish-finding system. Insufficient mounting can lead to several issues, including transducer slippage, vibration, and damage, compromising data quality and potentially damaging the equipment. A loose transducer can produce erratic readings, misrepresenting the underwater environment and hindering accurate fish identification. Vibration introduces noise into the sonar signal, obscuring valuable data and reducing the clarity of the display. For example, a transducer mounted with inadequate adhesive on a rough-water kayak might slip, causing inconsistent readings and potentially detaching completely. Conversely, a securely mounted transducer, affixed with appropriate hardware and sealant, provides a stable platform for clear, reliable data acquisition.
Several methods contribute to secure transducer mounting. Selecting the right mounting technique depends on the kayak’s hull material and design, as well as the specific transducer type. Common approaches include specialized adhesives, mounting brackets, and through-hull fittings. Adhesives provide a simple and versatile solution for smooth surfaces, while brackets offer added stability and adjustability. Through-hull fittings provide the most secure option, particularly for challenging environments, but require careful installation to maintain hull integrity. For instance, a through-hull mount is often preferred for inflatable kayaks or those frequently used in rough conditions, while an adhesive mount might suffice for a rigid kayak used in calm waters. Using marine-grade sealant around any penetrations is crucial for preventing leaks and ensuring long-term durability.
Proper mounting ensures the transducer remains in the optimal position for transmitting and receiving sonar signals, maximizing the fish finder’s effectiveness. A stable platform minimizes interference and allows the sonar cone to disperse effectively, providing accurate and consistent readings. The long-term performance and reliability of the fish finder depend heavily on the security of its mounting. Addressing this aspect meticulously contributes significantly to successful kayak fishing excursions. Neglecting this critical step can lead to equipment failure, compromised data, and ultimately, a less productive fishing experience.
3. Power Source
Reliable power delivery is essential for consistent operation of a kayak’s fish finder. Selecting and integrating an appropriate power source directly impacts the system’s performance and longevity. Insufficient power can lead to intermittent operation, inaccurate readings, and premature equipment failure. Careful consideration of power requirements, battery capacity, and wiring practices is crucial for a successful installation.
- Battery Selection
Fish finders typically require a dedicated 12-volt DC power source. Marine batteries are specifically designed for this purpose, offering deep-cycle capabilities and resistance to marine environments. Battery capacity, measured in ampere-hours (Ah), determines the duration of operation. Choosing a battery with sufficient capacity for the intended fishing duration is essential. For example, a smaller fish finder may operate effectively with a 7Ah battery for shorter trips, while larger units or longer excursions necessitate higher capacity options like a 12Ah battery. Using a dedicated marine battery also isolates the fish finder from other electrical systems on the kayak, preventing potential interference or power drain.
- Wiring and Connections
Proper wiring practices ensure efficient power delivery and minimize potential issues. Using marine-grade wiring, connectors, and fuses protects against corrosion and ensures reliable connections. Correctly sizing the wiring gauge prevents voltage drop and overheating. Fuses protect the fish finder and wiring from damage in case of a short circuit. For instance, using appropriately sized tinned copper wire with waterproof connectors prevents corrosion and ensures a consistent power supply to the unit. Including an inline fuse near the battery protects the system from overloads.
- Power Management
Efficient power management extends battery life and ensures consistent fish finder operation. Minimizing screen brightness and utilizing power-saving modes when appropriate can conserve energy. Regularly checking battery charge levels prevents unexpected power loss during fishing trips. Disconnecting the fish finder when not in use eliminates parasitic drain on the battery. For example, adjusting screen brightness to a level suitable for ambient light conditions conserves power without compromising visibility. Using a battery monitoring system allows for real-time assessment of remaining charge, facilitating informed decisions about power usage.
- Alternative Power Sources
While batteries are the most common power source, some kayaks offer integrated power systems or the possibility of incorporating solar panels. Integrated systems provide a streamlined power solution, but may limit flexibility in battery selection. Solar panels offer a sustainable option for supplementing battery power, particularly for extended trips. However, their effectiveness depends on sunlight availability. For example, a kayak with built-in wiring and a dedicated battery compartment simplifies installation and optimizes power distribution. Supplementing this with a small solar panel can maintain battery charge during longer outings.
A reliable power source forms the foundation of a well-functioning kayak fish finder setup. Careful consideration of battery selection, wiring practices, and power management strategies ensures consistent performance and maximizes the longevity of the equipment. By addressing these considerations effectively, anglers can confidently rely on their fish finder to provide accurate and reliable data, enhancing their fishing experience.
4. Cable Management
Effective cable management is integral to a successful fish finder installation on a kayak. Unorganized cables present several potential problems, including entanglement, damage, and interference with other kayak equipment. Entangled cables can hinder paddling, create tripping hazards, and potentially damage the wires themselves, leading to fish finder malfunction. Damage from abrasion against the kayak’s hull or exposure to the elements can also disrupt the fish finder’s operation. Furthermore, loose cables can interfere with fishing lines, rods, and other gear, creating frustration and potentially compromising fishing success. For example, a transducer cable allowed to dangle freely might become entangled in a fishing hook during casting, potentially damaging the cable or causing the transducer to detach. Conversely, a securely routed cable, fastened with clips or ties, minimizes such risks.
Several strategies promote effective cable management. Securing cables to the kayak using cable ties, clips, or adhesive mounts keeps them organized and minimizes movement. Routing cables along existing kayak features, such as deck lines or gunwales, provides a natural pathway and minimizes exposure. Choosing appropriate cable lengths avoids excess slack, reducing the potential for entanglement. Waterproof connectors and sealant protect connections from the elements, ensuring long-term reliability. For example, routing the power cable from the battery to the fish finder along the inside of the hull, secured with adhesive clips, protects it from damage and keeps it out of the way. Using waterproof connectors at the battery and fish finder ensures a secure and weather-resistant connection. Applying marine-grade sealant around these connections adds an extra layer of protection against corrosion.
Meticulous cable management contributes significantly to a clean, functional, and safe kayak fishing setup. It minimizes the risk of equipment damage and interference, allowing anglers to focus on fishing. Well-organized cables enhance the overall fishing experience, promoting efficiency and reducing potential frustrations. Furthermore, a tidy setup contributes to the longevity of the fish finder system by protecting its components from damage. This attention to detail translates to more productive and enjoyable time on the water. A well-executed cable management strategy reflects a commitment to maintaining a safe and efficient fishing platform, maximizing the enjoyment and success of kayak angling excursions.
5. Display Visibility
Display visibility is a critical factor in the effective utilization of a kayak-mounted fish finder. Optimal visibility ensures that anglers can readily interpret sonar data, maximizing the benefits of the technology. Placement of the display unit directly influences its visibility and, consequently, the angler’s ability to quickly and accurately assess underwater conditions. Factors such as glare, viewing angle, and proximity to the kayaker’s position all contribute to effective display visibility. Poor visibility can lead to misinterpretation of data, delayed reactions to fish or structure, and a diminished overall fishing experience. For example, a display mounted in a position subject to direct sunlight glare can render the screen unreadable, negating the advantages of the fish finder. Conversely, a display mounted within the kayaker’s natural line of sight, shielded from glare, allows for effortless data interpretation, enhancing real-time decision-making during fishing.
Several considerations enhance display visibility. Selecting a mounting location that minimizes glare, whether through physical shielding or strategic positioning, is paramount. Adjustable mounts allow for customization of the viewing angle, ensuring optimal visibility based on individual preferences and kayak configuration. Screen brightness adjustments further enhance visibility in varying light conditions. Some fish finders offer high-contrast display modes or color palettes that improve readability in bright sunlight or low-light situations. For example, utilizing a RAM mount system allows for flexible positioning of the display unit, enabling the angler to adjust the viewing angle to minimize glare and maximize comfort. Furthermore, selecting a fish finder with a high-resolution display improves clarity and detail, making it easier to interpret subtle changes in sonar readings.
Prioritizing display visibility optimizes the functionality of a kayak fish finder, translating to a more informed and productive fishing experience. Clear, readily accessible data empowers anglers to make timely decisions regarding lure selection, retrieval techniques, and fishing location adjustments. This enhanced situational awareness directly contributes to increased fishing success. Challenges such as varying light conditions and kayak motion can be effectively addressed through thoughtful display placement and utilization of available features like adjustable mounts and brightness controls. Integrating these considerations into the fish finder installation process ensures that the technology serves its intended purpose, enhancing angling effectiveness and overall enjoyment on the water.
Frequently Asked Questions
This section addresses common inquiries regarding the integration of fish finder technology with kayaks.
Question 1: What type of transducer is best suited for a kayak?
Transducer selection depends on several factors, including kayak type, fishing style, and target species. Transom-mount transducers are suitable for most kayaks, while in-hull or through-hull transducers may be preferable for specific hull designs or fishing conditions. Portable transducers offer flexibility for temporary setups.
Question 2: How is a fish finder powered on a kayak?
Typically, a 12-volt marine battery powers kayak fish finders. Battery capacity should align with anticipated usage duration. Some kayaks offer integrated power systems, while portable power packs or solar panels provide alternative solutions.
Question 3: Can a fish finder be used in both freshwater and saltwater environments?
Many fish finders function in both freshwater and saltwater. However, ensuring the transducer and wiring are rated for saltwater use is crucial to prevent corrosion and ensure longevity.
Question 4: What mounting methods are available for kayak fish finders?
Various mounting options cater to different kayak designs and preferences. These include track mounts, flush mounts, and portable mounts. Selecting a secure and stable mounting system is paramount for accurate readings and equipment protection.
Question 5: How does kayak movement affect fish finder performance?
Kayak movement, particularly in rough water, can introduce noise and interference into sonar readings. Proper transducer placement and secure mounting minimize these effects. Features like surface clutter suppression and noise rejection further enhance data clarity in turbulent conditions.
Question 6: How does one interpret the information displayed on a fish finder?
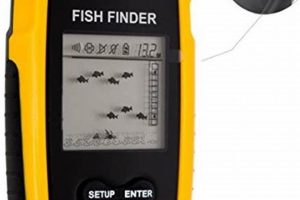
Understanding sonar readings involves recognizing different display elements, such as depth, bottom contour, water temperature, and fish arches. Consulting the fish finder’s user manual and practicing interpretation in various environments enhance comprehension. Numerous online resources and tutorials offer guidance on interpreting sonar data effectively.
Careful consideration of these frequently asked questions contributes to informed decisions regarding fish finder selection and installation on a kayak. Addressing these aspects enhances the effectiveness of the technology, maximizing fishing success.
The following section offers further resources and support for integrating fish finder technology into a kayak fishing setup.
Conclusion
Equipping a kayak with a fish finder significantly enhances angling opportunities. Successful integration requires careful consideration of transducer selection and placement, secure mounting techniques, reliable power sources, effective cable management, and optimal display visibility. Each of these elements contributes to the overall performance and longevity of the system, ensuring accurate sonar readings and facilitating informed fishing decisions. Proper installation maximizes the benefits of this technology, providing anglers with valuable insights into underwater environments and fish behavior. Understanding the nuances of each component and their interplay is crucial for a successful and rewarding kayak fishing experience.
Strategic integration of sonar technology empowers anglers to explore underwater environments with greater precision and efficiency. This knowledge translates to increased fishing success and a deeper understanding of aquatic ecosystems. As technology continues to evolve, kayak anglers can expect further advancements in fish finding capabilities, opening up new possibilities for exploration and discovery. Continual learning and adaptation to these advancements will remain essential for maximizing the benefits of this powerful tool in the pursuit of angling excellence.


