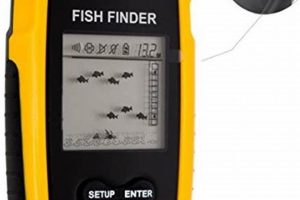
Equipping a small watercraft with sonar technology for locating fish involves several key considerations, including transducer placement, power supply integration, and display unit mounting. For example, the transducer, which emits and receives sonar signals, can be mounted inside the hull, on the transom, or through-hull for optimal performance depending on the kayak’s construction and the user’s needs. Similarly, powering the unit can involve various solutions ranging from battery packs to dedicated wiring systems. Finally, the display unit must be positioned within easy reach and sight for efficient operation during navigation.
This process enhances angling success by providing real-time underwater information, such as depth readings, bottom contours, and fish locations. This empowers anglers to target specific areas and depths, increasing efficiency and catch rates. Historically, anglers relied on experience and intuition to find productive fishing spots. The development and miniaturization of sonar technology, coupled with its adaptation to kayak fishing, has revolutionized the sport, offering a significant advantage in locating fish. This capability opens up new possibilities for anglers of all skill levels.
The following sections delve into specific aspects of equipping a kayak with this technology, including detailed instructions on various installation methods, power management techniques, and selecting the best equipment for individual needs and budgets. Furthermore, troubleshooting tips and best practices for maintenance will be covered to ensure long-term functionality and optimal performance.
Kayak Fish Finder Installation Tips
Proper installation is crucial for optimal fish finder performance and longevity. The following tips offer guidance for a successful outcome.
Tip 1: Transducer Placement: Careful consideration should be given to transducer placement to avoid interference and ensure accurate readings. Inside-hull mounting offers convenience and protection but can slightly reduce sensitivity. Transom mounting provides good performance for most kayaks. Through-hull mounting offers the best performance but requires more complex installation.
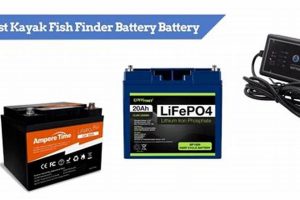
Tip 2: Power Management: Employ a dedicated power source for the fish finder to prevent interference with other electronics and ensure consistent operation. Use marine-grade wiring and connectors for durability and water resistance. Consider the fish finder’s power requirements when selecting a battery.
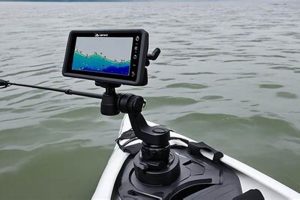
Tip 3: Display Unit Mounting: Securely mount the display unit within easy view and reach. Adjustable mounts allow for optimal viewing angles in various lighting conditions. Ensure the unit is protected from direct sunlight and water spray.
Tip 4: Cable Routing: Route cables carefully to prevent entanglement and damage. Use cable ties or clips to secure wiring and minimize clutter. Avoid sharp bends or kinks in the cables. Consider using waterproof connectors where possible.
Tip 5: Sealant Application: Use marine-grade sealant to prevent water intrusion around any drilled holes or exposed wiring. This helps protect the kayak and the electronics from damage. Ensure proper curing time for the sealant before exposing it to water.
Tip 6: Testing and Calibration: Test the fish finder thoroughly after installation to ensure proper functionality. Calibrate the unit according to the manufacturer’s instructions for accurate depth readings and target identification. Perform regular checks to maintain optimal performance.
Tip 7: Consider Kayak-Specific Models: Some fish finders are designed specifically for kayaks, featuring compact designs and specialized mounting options. These can simplify the installation process and provide a more integrated solution.
By following these tips, anglers can ensure a successful installation process and maximize the benefits of their fish finder, leading to increased angling success and enjoyment on the water.
This comprehensive guide provides a solid foundation for a successful installation. By carefully planning and executing each step, anglers can ensure a reliable and efficient system for years to come.
1. Planning
A successful kayak fish finder installation hinges on thorough planning. Pre-installation preparation prevents common issues and ensures optimal performance, maximizing the angler’s investment and enhancing the fishing experience. A well-defined plan streamlines the installation process and minimizes potential complications.
- Equipment Selection
Choosing the right fish finder and accessories is paramount. Factors such as target species, fishing environment (freshwater or saltwater), kayak type, and budget influence equipment choices. For example, a kayak angler targeting offshore species requires a more powerful fish finder with a GPS and chartplotting capabilities compared to an angler fishing in a small lake. Selecting compatible transducers, batteries, and mounting hardware ensures seamless integration and optimal performance.
- Layout and Positioning
Determining the optimal locations for the display unit, transducer, and power source before installation is essential. The display unit should be easily visible and accessible from the paddling position. The transducer requires careful placement to avoid interference and maximize sonar effectiveness. The power source should be located safely and efficiently. Creating a layout diagram on paper or using digital tools can aid visualization and prevent conflicts during installation.
- Power Management Strategy
Defining the power supply system is crucial. Options include dedicated batteries, connection to existing kayak wiring, or portable power packs. Calculating power consumption and battery life ensures uninterrupted operation during fishing trips. Selecting appropriate wiring, fuses, and connectors ensures safety and reliability. For example, using a dedicated deep-cycle marine battery provides ample power for extended use, while incorporating a fuse protects the system from overloads.
- Installation Method
Planning the installation approach, considering factors such as kayak construction and available tools, is crucial. Different transducer mounting methods require specific tools and techniques. Deciding on cable routing and securing methods ensures a clean and organized installation. Researching various installation methods and watching instructional videos can prepare the angler for a smooth and efficient process. For example, installing a through-hull transducer requires specialized tools and careful sealing to prevent leaks.
By addressing these planning elements, anglers can ensure a smooth and efficient installation process, minimizing potential issues and maximizing the long-term performance of their fish finder. This proactive approach leads to a more enjoyable and productive fishing experience.
2. Transducer Placement
Transducer placement is a critical aspect of kayak fish finder installation, directly impacting sonar performance and data accuracy. The transducer, responsible for transmitting and receiving sonar signals, requires careful positioning to avoid interference and maximize effectiveness. Incorrect placement can lead to inaccurate readings, reduced sensitivity, and interference from the kayak’s hull or other onboard equipment. For instance, placing the transducer too close to the trolling motor can result in interference from its electrical field, distorting sonar readings. Conversely, optimal placement provides clear, accurate data, enabling anglers to identify fish, bottom structure, and depth contours effectively.
Several placement options exist, each with advantages and disadvantages. Inside-hull mounting offers convenience and protection but can slightly reduce sensitivity due to signal attenuation through the hull material. Transom mounting provides a balance between performance and ease of installation, suitable for most kayak types. Through-hull mounting delivers the best performance with minimal interference, though it requires more complex installation and careful sealing to prevent leaks. Choosing the right method depends on factors such as kayak construction, desired performance level, and angler experience. For example, a kayak with a complex hull shape might benefit from a through-hull transducer to avoid signal distortion, while an angler prioritizing ease of installation might opt for transom mounting.
Careful consideration of transducer placement during kayak fish finder installation is paramount for accurate data acquisition and optimal sonar performance. Understanding the various mounting options and their implications allows anglers to make informed decisions based on individual needs and kayak characteristics. Correct placement contributes significantly to a more productive and enjoyable fishing experience by providing reliable underwater insights. Addressing potential interference sources during installation further enhances data accuracy, allowing for more informed decisions on the water.
3. Power Supply
A stable and reliable power supply is fundamental to successful kayak fish finder installation and operation. The power supply’s capacity and configuration directly influence the fish finder’s performance, longevity, and overall user experience. Insufficient power can lead to intermittent operation, inaccurate readings, and premature battery failure. Conversely, a well-planned power system ensures consistent functionality, maximizing the fish finder’s capabilities and contributing to a more productive fishing experience. For instance, a fish finder requiring 10 amps and operating for 8 hours necessitates a battery with at least an 80 amp-hour capacity. Using a smaller capacity battery could result in power depletion mid-trip, rendering the fish finder useless. Conversely, a higher capacity battery provides a safety margin and extends operational time.
Several power supply options exist for kayak fish finder installations, each with inherent advantages and disadvantages. Direct battery connections offer simplicity and dedicated power but require careful battery selection and wiring practices. Integrating the fish finder into the kayak’s existing electrical system offers a streamlined approach but necessitates understanding the system’s capacity and potential for interference. Utilizing portable power packs provides flexibility and portability, though capacity limitations and recharging requirements must be considered. For example, directly connecting the fish finder to a dedicated 12V marine battery ensures consistent power, while integrating the fish finder into the kayak’s electrical system simplifies installation but requires careful consideration of existing loads and wiring capacity. Portable power packs are ideal for shorter trips or kayaks without existing electrical systems, though battery life must be factored into the fishing plan. Choosing the appropriate power solution depends on the fish finder’s power requirements, the kayak’s electrical system, and the angler’s specific needs and preferences.
Effective power management is crucial for maximizing fish finder performance and longevity. Using appropriate wiring gauge, fuses, and connectors prevents voltage drops, protects against overloads, and ensures reliable operation. Waterproofing connections and employing marine-grade components safeguards the system from corrosion and damage. Regularly inspecting and maintaining the power system, including checking battery health and connection integrity, contributes to long-term reliability and uninterrupted operation. Understanding these aspects of power supply selection and management is vital for a successful kayak fish finder installation, enhancing the fishing experience and ensuring reliable underwater insights.
4. Display Mounting
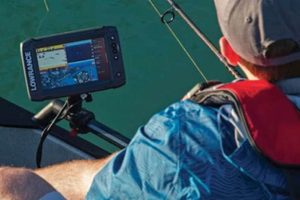
Display mounting constitutes a crucial element of kayak fish finder installation, directly influencing user experience and operational efficiency. Proper mounting ensures clear visibility, convenient access to controls, and protection from the elements. A poorly mounted display can hinder navigation, impede fish identification, and compromise user safety. Optimal mounting enhances situational awareness, improves reaction time, and maximizes the fish finder’s utility. For example, a display mounted too low or at an awkward angle forces the angler into uncomfortable positions, increasing fatigue and reducing focus. A well-mounted display, conversely, contributes to a more ergonomic and efficient fishing experience.
- Visibility and Accessibility
Display placement prioritizes unobstructed visibility from the angler’s seated position. Factors such as kayak layout, paddling style, and potential glare influence mounting location. Easy reach for button operation and menu navigation is essential. Adjustable mounts accommodate various angler preferences and lighting conditions. For instance, a swivel mount permits quick adjustments for optimal viewing angles in varying sunlight. Positioning the display near other essential instruments, such as rod holders or paddle clips, further streamlines workflow.
- Security and Stability
Secure mounting prevents movement or detachment during paddling, particularly in rough water. Robust mounting hardware and compatible surfaces ensure stability. Reinforced mounting locations on the kayak prevent stress fractures or damage. For example, using a reinforced mounting plate distributes forces across a larger area, preventing cracking. Properly secured wiring prevents entanglement and damage. Consideration of potential impacts from paddles or fishing gear during casting is essential.
- Environmental Protection
Protecting the display from water spray, direct sunlight, and impact is crucial for longevity and functionality. Waterproof housings or covers safeguard against moisture damage. Positioning the display away from direct sunlight prevents overheating and screen glare. Recessed mounting or protective shields mitigate impact damage. For example, a waterproof cover safeguards the display during transport or storage. Positioning the display under the kayak’s gunwale offers some protection from overhead spray.
- Integration with Kayak Layout
Display mounting integrates seamlessly with the overall kayak layout, minimizing interference with paddling and fishing activities. Cable routing considers ergonomics and avoids entanglement with fishing lines or other equipment. Mount placement avoids obstruction of essential access points or storage compartments. Balancing display visibility with access to other equipment optimizes workspace efficiency. For example, routing cables along the gunwale keeps them out of the way of paddling strokes. Positioning the display mount away from rod holders prevents interference during casting.
Effective display mounting is integral to a successful kayak fish finder installation. Careful consideration of these factors contributes significantly to an enhanced fishing experience, maximizing the fish finder’s capabilities while prioritizing user comfort and safety. A well-mounted display provides critical information at a glance, enabling informed decisions and improved angling success. This attention to detail during installation pays dividends on the water, transforming the fish finder from a mere tool into a seamless extension of the angler’s senses.
5. Cable Management
Effective cable management is essential for a successful kayak fish finder installation. Proper routing and securing of cables prevents interference, minimizes damage, and contributes to a clean, organized setup. Neglected cable management can lead to tangled lines, compromised functionality, and potential safety hazards. Organized wiring ensures consistent fish finder performance and enhances the overall kayaking experience.
- Interference Prevention
Careful cable routing minimizes interference with the fish finder’s transducer and other electronic equipment. Separating power cables from transducer cables reduces electrical noise and ensures accurate sonar readings. Keeping cables away from the trolling motor and other potential sources of interference is crucial for optimal fish finder operation. For example, running the transducer cable close to the power cable can introduce electrical noise into the sonar signal, degrading image quality.
- Protection from Damage
Securing cables protects them from abrasion, cuts, and entanglement. Using cable ties, clips, or conduits safeguards wiring from sharp edges, moving parts, and accidental damage. Properly secured cables prevent snags and reduce the risk of disconnection. For example, routing cables through protective tubing safeguards them from abrasion against the kayak’s hull, particularly in areas exposed to friction.
- Organized Setup
Organized cable management contributes to a clean and efficient kayak setup. Bundling and securing cables minimizes clutter, enhances aesthetics, and simplifies troubleshooting. Clearly labeled cables facilitate maintenance and future modifications. An organized system simplifies tracing wires and identifying potential issues, saving time and frustration. For example, labeling cables with their respective functions facilitates troubleshooting and system upgrades.
- Safety Enhancement
Proper cable management enhances safety by reducing tripping hazards and preventing entanglement with fishing gear or other equipment. Securing loose cables minimizes the risk of entanglement with paddles or fishing lines, improving overall safety on the water. An organized setup reduces clutter and enhances situational awareness, contributing to a safer kayaking experience. For example, securing cables along the kayak’s gunwales prevents them from dangling into the cockpit, reducing tripping hazards.
Effective cable management during kayak fish finder installation is an investment in long-term performance, safety, and overall user experience. By addressing these considerations, anglers can ensure a clean, functional, and safe setup, maximizing their enjoyment on the water and ensuring consistent fish finder operation. This attention to detail contributes significantly to a more productive and enjoyable fishing experience.
6. Testing
Thorough testing is the final, crucial stage of a kayak fish finder installation. It verifies proper functionality, identifies potential issues, and ensures optimal performance on the water. Testing confirms the integration of all componentsthe transducer, display unit, power supply, and wiringfunction as a cohesive system. Neglecting this stage can lead to malfunctions during fishing trips, compromising valuable time and potentially impacting safety. Comprehensive testing allows for adjustments and corrections before deployment, maximizing the effectiveness of the fish finder and enhancing the angling experience.
- Power System Check
Verifying the power system’s stability is paramount. This involves checking voltage levels at the battery and fish finder connections to ensure adequate power delivery. Testing battery capacity under load confirms its ability to sustain the fish finder’s operation for the intended duration. Identifying and addressing any voltage drops or power fluctuations prevents unexpected shutdowns and ensures reliable operation on the water. For example, connecting a voltmeter to the fish finder’s power leads confirms the voltage supplied by the battery matches the device’s requirements. A load test, simulating actual fish finder usage, identifies potential battery weaknesses before they impact a fishing trip.
- Transducer Performance Evaluation
Assessing transducer performance involves verifying accurate depth readings and clear sonar imagery. Testing in a controlled environment, such as a swimming pool or shallow, clear water, allows for accurate evaluation of signal quality and target detection. Observing the fish finder’s ability to distinguish bottom contours, submerged objects, and fish echoes confirms proper transducer installation and functionality. For example, observing the clarity of bottom returns and the detection of known objects at specific depths confirms proper transducer alignment and sensitivity.
- Display Unit Functionality
Confirming all display functions operate correctly is essential. This includes testing button responsiveness, menu navigation, and data accuracy. Verifying display brightness and readability in various lighting conditions ensures usability in diverse environments. Adjusting display settings and customizing views optimize the user interface for individual preferences and fishing conditions. For example, navigating through menus, adjusting gain and sensitivity settings, and simulating different depth ranges verifies proper display functionality.
- System Integration Validation
Comprehensive system testing involves operating the fish finder under simulated fishing conditions. This confirms the integrated functionality of all components, including the transducer, display unit, and power supply. Checking for interference between systems, such as the trolling motor or other electronic devices, ensures accurate data and prevents disruptions during operation. For example, running the trolling motor simultaneously with the fish finder identifies potential electrical interference impacting sonar readings.
Comprehensive testing following kayak fish finder installation is paramount for ensuring optimal performance, identifying potential issues, and maximizing the effectiveness of the equipment. By methodically verifying each component and their integrated functionality, anglers can confidently embark on fishing trips knowing their fish finder will provide accurate and reliable underwater insights. Thorough testing transforms the fish finder from a simple tool into a trusted partner on the water, enhancing the angling experience and increasing the likelihood of success.
Frequently Asked Questions
Addressing common queries regarding sonar integration on small watercraft can clarify potential uncertainties and facilitate informed decision-making.
Question 1: What transducer mounting method is most suitable for a recreational kayak?
Transom mounting generally offers a suitable balance between performance and ease of installation for recreational kayaks. Inside-hull mounting offers convenience but may slightly reduce sensitivity. Through-hull mounting provides optimal performance but requires more complex installation.
Question 2: How much battery capacity is necessary to power a fish finder for a full day of fishing?
Battery capacity requirements depend on the fish finder’s power consumption. Calculating total power consumption over the fishing duration helps determine the necessary battery amp-hour rating. A marine battery with sufficient capacity is recommended for extended use.
Question 3: Can existing kayak wiring be utilized for fish finder power, or is a dedicated battery necessary?
While integrating into existing wiring is possible, a dedicated marine battery is often recommended to ensure consistent power and prevent interference with other electronics. Assessing the kayak’s electrical system capacity is crucial before integration.
Question 4: What tools are typically required for fish finder installation on a kayak?
Required tools vary depending on the chosen installation method. Commonly used tools include drills, screwdrivers, wire strippers/crimpers, and sealant applicators. Specific transducer mounting methods may require specialized tools.
Question 5: How can interference from the trolling motor be minimized during fish finder operation?
Proper cable routing and separation of power and transducer cables are crucial for minimizing interference. Ensuring adequate distance between the transducer and trolling motor also helps reduce interference. Using a dedicated battery for the fish finder further mitigates potential issues.
Question 6: What maintenance procedures are recommended for ensuring long-term fish finder performance?
Regularly inspecting and cleaning the transducer, checking wiring connections, and protecting the display from the elements are essential maintenance practices. Periodically testing battery health and ensuring software updates also contribute to long-term performance.
Careful consideration of these frequently asked questions can significantly contribute to a successful installation and enhanced angling experience. Understanding these aspects empowers informed decisions and maximizes the benefits of integrating sonar technology for improved fishing success.
The next section offers a comprehensive troubleshooting guide for addressing common issues encountered during and after installation.
Kayak Fish Finder Installation
Successful integration of sonar technology onto a kayak hinges on meticulous planning and execution across several key areas. Proper transducer placement, whether through-hull, transom-mounted, or inside-hull, dictates data accuracy and overall system effectiveness. A robust and reliable power supply, often a dedicated marine battery, ensures consistent operation, while thoughtful display mounting prioritizes both visibility and accessibility. Effective cable management minimizes interference and safeguards against damage, ensuring long-term functionality. Rigorous testing validates system integrity and performance prior to deployment on the water.
Ultimately, effective sonar system implementation empowers anglers with enhanced underwater awareness, significantly contributing to improved fishing success. Careful consideration of these installation aspects transforms advanced technology into a seamless extension of angling skill, unlocking new possibilities on the water. This investment in preparation translates directly into a more informed and productive fishing experience.


