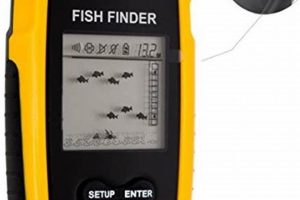
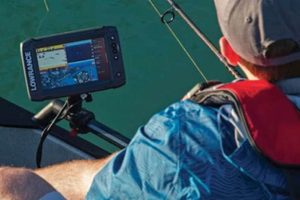
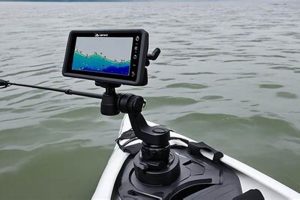
Equipping a kayak with sonar technology provides anglers with a significant advantage by allowing them to locate fish and underwater structures. This involves mounting a transducer, display unit, and power source onto the small vessel, requiring careful planning and execution to ensure functionality and maintain the kayak’s balance. A typical setup might include a transom-mounted transducer, a display head near the cockpit, and a battery tucked away in a dry storage compartment.
The ability to visualize underwater terrain and fish populations significantly enhances angling success. This technology allows for strategic positioning in areas likely to hold fish, contributing to more efficient and productive fishing trips. Prior to this technology, kayak anglers relied primarily on experience and guesswork to locate fish, making this a significant advancement in the sport. The integration of electronics has broadened the possibilities of kayak fishing, opening up new opportunities for both novice and experienced anglers.
This article will explore the various aspects of this process, covering topics such as transducer placement, wiring techniques, power management, and display mounting options. It will also delve into the different types of fish finders available and provide practical tips for choosing the best system for individual needs and kayak configurations.
Tips for Kayak Fish Finder Installation
Proper installation is crucial for optimal fish finder performance and longevity. These tips provide guidance for a successful installation process.
Tip 1: Transducer Placement: Careful consideration of transducer placement is paramount. Avoid areas of turbulence or interference from the hull or other accessories. Transom mounting is often preferred for kayaks, but through-hull installations offer better readings in certain situations. Ensure the transducer sits below the waterline at all speeds.
Tip 2: Wiring Management: Clean and organized wiring is essential for both aesthetics and functionality. Use marine-grade wiring and connectors to protect against corrosion. Securely fasten wires to the kayak using zip ties or clips to prevent entanglement and damage.
Tip 3: Power Source Selection: A dedicated 12-volt battery is recommended for powering the fish finder. Choose a battery with sufficient capacity for the duration of fishing trips. Consider using a sealed battery box to protect against water exposure and potential damage.
Tip 4: Display Mounting: Select a mounting location for the display unit that provides clear visibility and easy access to controls. Consider using a RAM mount or similar adjustable system for optimal positioning. Ensure the display is protected from direct sunlight and spray.
Tip 5: Waterproofing: Thoroughly seal all connections and entry points to prevent water intrusion. Apply marine sealant around any drilled holes or exposed wiring. Regularly inspect and maintain seals to ensure continued protection.
Tip 6: Cable Management: Use cable ties or tubing to bundle and secure excess cable, preventing tangles and interference with paddling. Route cables along the inside of the kayak whenever possible to minimize exposure to the elements.
Tip 7: Testing and Calibration: After installation, thoroughly test the fish finder’s operation in shallow water. Calibrate the unit according to the manufacturer’s instructions to ensure accurate readings and optimal performance.
Following these guidelines ensures a functional and reliable setup, maximizing the benefits of sonar technology on the water. A well-integrated system provides valuable data for locating fish and understanding underwater environments.
This installation guide provides a solid foundation for equipping a kayak with a fish finder. The next section will delve into specific techniques for different kayak types and fish finder models.
1. Planning
Thorough planning forms the foundation of a successful fish finder installation on a kayak. A well-defined plan anticipates potential challenges, optimizes component placement, and streamlines the installation process, ultimately contributing to a more functional and enjoyable fishing experience. Overlooking this crucial stage can lead to suboptimal performance, unnecessary modifications, and potential frustration on the water.
- Kayak Compatibility
Different kayaks have unique hull shapes, storage capacities, and mounting options. Understanding these characteristics is essential for selecting compatible fish finder components. A sit-on-top kayak, for instance, presents different mounting considerations than a sit-inside model. Careful consideration of kayak specifics ensures a seamless integration of the fish finder system.
- Transducer Selection and Placement
The transducer, responsible for sending and receiving sonar signals, plays a critical role in fish finder performance. Factors such as fishing style, target species, and water conditions influence transducer selection. Determining the optimal mounting location, whether transom-mounted, through-hull, or inside-hull, requires careful consideration of potential interference and desired readings. For example, a kayak angler frequently fishing in shallow, weedy areas might opt for a side-imaging transducer with weedless capabilities.
- Power Management
Powering the fish finder requires selecting an appropriate battery and planning its placement within the kayak. Factors like battery capacity, weight, and available storage space influence this decision. Proper wiring and the use of marine-grade connectors ensure reliable power delivery and minimize the risk of corrosion. A dedicated battery box provides protection and secure storage. Understanding power requirements and planning accordingly prevents unexpected power loss during fishing trips.
- Display Mounting and Cable Routing
Visibility and accessibility are paramount when choosing a location for the display unit. Ergonomic considerations and potential interference from paddling strokes influence mounting decisions. Planning cable routes beforehand minimizes clutter, prevents entanglement, and protects wiring from damage. A well-planned layout contributes to a clean, functional, and user-friendly cockpit environment.
By addressing these facets during the planning phase, kayak anglers create a roadmap for a successful fish finder installation. This proactive approach minimizes potential complications, maximizes performance, and ensures a streamlined setup tailored to individual needs and kayak configurations. Ultimately, meticulous planning translates to a more efficient and rewarding fishing experience on the water.
2. Placement
Optimal fish finder performance relies heavily on strategic component placement during installation. The effectiveness of each elementthe transducer, display unit, and power sourceis directly influenced by its location on the kayak. Incorrect placement can lead to inaccurate readings, interference, and reduced functionality, ultimately hindering the angler’s ability to locate fish and understand underwater structures. Consider the transducer, the heart of the system. Placing it too close to the kayak’s motor or in an area of turbulent water flow can create interference, distorting sonar readings. Conversely, a well-placed transducer, clear of obstructions and aligned correctly with the waterline, provides clean, accurate data.
The display unit’s position also significantly impacts usability. Mounting the display in a location that obstructs paddling or requires excessive movement to view hinders efficient operation. Ideally, the display should be readily visible and accessible without compromising paddling ergonomics or safety. Similarly, the power source, typically a battery, requires careful placement to ensure balance and accessibility. An uneven weight distribution can affect kayak stability, while an inaccessible battery complicates routine maintenance and replacement. For instance, placing a heavy battery too far forward or aft can alter the kayak’s trim, impacting its handling characteristics. Distributing weight evenly and securing the battery in a readily accessible location ensures both stability and convenient maintenance.
Understanding the interconnectedness of placement and performance is crucial for maximizing the benefits of a kayak fish finder. Careful consideration of each component’s location during installation, taking into account potential interference, accessibility, and kayak balance, ensures optimal functionality and a more productive fishing experience. Failure to prioritize placement can compromise the entire system, rendering the technology less effective and potentially hindering angling success. Therefore, strategic planning and meticulous execution during the placement phase are essential for a successful and rewarding integration of a fish finder onto a kayak.
3. Wiring
Wiring forms the critical link between the various components of a kayak fish finder system, directly impacting its functionality and longevity. Proper wiring ensures reliable power delivery to the display unit and transducer, enabling seamless communication and accurate data transmission. Neglecting wiring best practices can lead to power loss, intermittent operation, and even permanent damage to the electronics, significantly compromising the effectiveness of the fish finder. Using marine-grade tinned copper wire, specifically designed to resist corrosion in harsh marine environments, is essential. Employing appropriately sized wiring gauges ensures sufficient current flow, preventing voltage drops and overheating. For example, using a wire gauge too small for the current draw can lead to excessive resistance, resulting in diminished performance and potential fire hazards.
Careful routing and securing of wiring contribute to both functionality and aesthetics. Securing wires away from moving parts, such as pedals or the kayak’s hull, prevents damage and ensures consistent operation. Employing zip ties, adhesive clips, or conduit protects wiring from abrasion and UV exposure, prolonging its lifespan. Furthermore, organized wiring facilitates troubleshooting and future modifications, streamlining maintenance and upgrades. A well-organized wiring harness not only enhances the system’s reliability but also contributes to a clean and professional installation. Conversely, tangled or poorly routed wires can impede access to other kayak components and create potential safety hazards. For instance, loose wires near the rudder or propulsion system can interfere with their operation, affecting maneuverability and control.
Effective wiring practices are fundamental to a successful kayak fish finder installation. Employing marine-grade materials, selecting appropriate wire gauges, and implementing meticulous routing and securing techniques safeguard the system’s integrity, ensuring reliable operation and maximizing its lifespan. Careful attention to wiring details, while often overlooked, represents a crucial investment in the long-term performance and enjoyment of the fish finder system. This proactive approach minimizes potential issues, ensuring consistent functionality and enabling anglers to focus on what matters most: locating fish and exploring the underwater world.
4. Power
A reliable power source is fundamental to the operation of a kayak fish finder. The chosen power supply dictates the system’s runtime, functionality, and overall reliability. Understanding power requirements and selecting an appropriate battery is crucial for a successful installation and a positive user experience. Fish finders typically operate on 12-volt DC power, necessitating a dedicated marine battery. Battery capacity, measured in ampere-hours (Ah), determines the duration of operation. Higher capacity batteries provide longer runtimes but come with increased weight and cost. Calculating expected usage time and selecting a battery with sufficient capacity prevents premature power depletion during fishing trips. For example, a fish finder with a moderate power draw might operate for 8-10 hours on a 12Ah battery, while a higher-powered unit or extended use might require a larger capacity battery. Moreover, battery type significantly impacts performance and longevity. Sealed lead-acid (SLA) batteries offer a cost-effective solution but require careful handling to prevent spills and leaks. Lithium-ion batteries, while more expensive, provide higher energy density and longer lifespans, making them a compelling option for frequent users.
Proper power management extends beyond battery selection to include wiring and connections. Using marine-grade wiring and connectors safeguards against corrosion and ensures consistent power delivery. Fusing the power circuit protects the fish finder from voltage spikes and overload situations. Correctly sizing the fuse, matching it to the fish finder’s current draw, is crucial for effective protection. Oversizing the fuse negates its protective function, while undersizing can lead to nuisance tripping. Furthermore, incorporating a master power switch provides a convenient way to isolate the fish finder from the battery, minimizing parasitic drain during storage and transport. This simple addition prolongs battery life and reduces the risk of accidental discharge. Additionally, considering the power demands of other onboard electronics, such as lights or GPS units, when selecting a battery and designing the power system ensures adequate power distribution and prevents system conflicts. A comprehensive power management strategy optimizes system performance and extends its operational lifespan.
Addressing power requirements proactively during the planning and installation phases ensures a reliable and functional kayak fish finder setup. Careful battery selection, proper wiring practices, and the inclusion of protective measures safeguard the electronics and contribute to a positive user experience. Neglecting these aspects can lead to power-related issues, curtailing fishing trips and potentially damaging sensitive electronic components. A well-designed power system, therefore, represents a crucial investment in the long-term performance and enjoyment of a kayak fishing setup.
5. Mounting
Secure and accessible mounting of fish finder components is crucial for optimal operation and user experience in a kayak. Proper mounting ensures the transducer provides accurate readings, the display remains visible and accessible, and the battery stays protected and balanced within the kayak’s limited space. Inadequate mounting can lead to equipment damage, interference with sonar signals, and an inconvenient user interface, ultimately hindering the effectiveness of the fish finder system.
- Transducer Mounting
Transducer placement significantly influences sonar performance. Common mounting locations on kayaks include transom mounting, through-hull mounting, and inside-hull mounting. Each method presents distinct advantages and disadvantages. Transom mounting offers straightforward installation but can be susceptible to turbulence. Through-hull mounting provides optimal performance but requires more invasive installation. Inside-hull mounting avoids external protrusions but may compromise signal clarity. Choosing the appropriate method depends on the kayak’s hull material, desired performance level, and angler preference. For example, a through-hull transducer provides the cleanest signal, ideal for deep-water fishing, while a transom-mounted transducer suits shallower waters and easier installation.
- Display Unit Mounting
The display unit’s mounting location directly impacts user experience. Visibility, accessibility, and protection from the elements are key considerations. Utilizing adjustable mounts, such as RAM mounts, allows anglers to customize the display’s position for optimal viewing angles. Positioning the display within easy reach minimizes distractions while paddling and fishing. Protecting the display from direct sunlight and water spray ensures clear visibility and prolongs its lifespan. For instance, mounting the display near the cockpit provides convenient access to controls and information without obstructing paddling movements.
- Battery Mounting
Secure battery mounting is essential for both safety and kayak stability. A dedicated battery box, securely fastened within the kayak, protects the battery from water damage and prevents shifting during paddling. Weight distribution plays a crucial role in kayak balance; therefore, battery placement should consider overall weight distribution within the kayak. Positioning the battery near the center of gravity minimizes its impact on stability and handling. Moreover, ensuring easy access to the battery facilitates routine maintenance and replacement. For example, mounting the battery in a central, accessible hatch allows for easy checks and changes without requiring significant rearrangement of gear.
- Cable Management and Securing
Proper cable management complements mounting by ensuring a clean and functional installation. Securing cables with zip ties or clips prevents tangling and protects them from abrasion and damage. Routing cables along the inside of the kayak minimizes exposure to the elements and reduces the risk of snagging. Furthermore, well-managed cabling contributes to a more organized and aesthetically pleasing setup. For instance, routing transducer cables through dedicated channels or sleeves protects them from chafing and ensures consistent sonar performance.
Effective mounting solutions contribute significantly to the overall success of a kayak fish finder installation. Securely mounting components in accessible locations maximizes functionality, enhances user experience, and protects valuable equipment. Careful consideration of mounting options during the planning and installation process ensures a streamlined and efficient setup, allowing anglers to fully utilize the fish finder’s capabilities and enjoy a more productive fishing experience.
6. Securing
Securing components constitutes a critical phase in the installation of a kayak fish finder, directly impacting the system’s longevity, performance, and safety. Properly secured components resist the dynamic forces encountered during paddling, ensuring consistent operation and preventing damage or loss. This encompasses not only the physical attachment of components but also the protection of wiring and connections from environmental factors. Neglecting this aspect can lead to premature equipment failure, compromised functionality, and potential safety hazards on the water. For instance, a loosely mounted transducer may vibrate excessively, degrading sonar readings or even detaching completely. Similarly, unsecured wiring can tangle with paddling gear, creating a distraction or potentially damaging the electrical connections.
Several factors influence securing strategies. The kayak’s construction material, whether plastic, composite, or inflatable, dictates appropriate fastening methods. Environmental considerations, such as exposure to saltwater, necessitate the use of corrosion-resistant hardware and sealants. The specific components themselves influence securing techniques. Transducers require rigid mounting to maintain optimal sonar cone angles, while display units benefit from adjustable mounts to accommodate user preferences. Batteries require secure placement to prevent shifting and potential damage. For example, securing a transducer to a composite kayak hull may involve using stainless steel screws and marine sealant to prevent water intrusion and ensure a robust bond. In contrast, securing components to an inflatable kayak might require specialized adhesives or mounting brackets designed for flexible surfaces.
Effective securing practices safeguard the investment in a fish finder system and contribute to a safer, more productive fishing experience. Robust mounting prevents equipment loss and ensures consistent performance. Protecting wiring and connections from the elements mitigates corrosion and electrical faults. Furthermore, a well-secured system minimizes distractions and enhances user confidence, allowing anglers to focus on locating fish and navigating waterways. Failing to prioritize securing measures during installation compromises the system’s integrity and increases the risk of malfunctions, ultimately detracting from the overall fishing experience. Therefore, meticulous attention to securing details is paramount for maximizing the lifespan and effectiveness of a kayak fish finder installation.
7. Testing
Systematic testing is essential after installing a fish finder on a kayak. This process verifies correct installation, optimizes settings, and ensures reliable operation on the water. Thorough testing identifies and addresses potential issues before they impact fishing trips, maximizing the effectiveness of the new equipment and contributing to a more productive and enjoyable experience.
- Power and Connections
Initial tests confirm proper power delivery and connection integrity. Checking battery voltage ensures adequate power supply. Verifying connections between the display unit, transducer, and power source confirms signal continuity and prevents intermittent operation. For example, a multimeter can be used to check voltage levels and identify any voltage drops across connections, indicating potential wiring issues.
- Transducer Functionality
Testing the transducer involves verifying its ability to send and receive sonar signals. Observing the display unit for depth readings and bottom contour confirms basic functionality. Further tests, such as checking for interference or adjusting sensitivity settings, optimize performance for specific fishing conditions. For example, testing in shallow, clear water allows for visual confirmation of bottom structure and depth accuracy against known markers.
- Display Unit Operation
Display unit testing focuses on verifying all features and controls function correctly. Navigating menus, adjusting settings, and activating sonar modes confirms proper operation. This also includes checking screen brightness and clarity under varying light conditions to ensure optimal visibility on the water. For example, adjusting gain and sensitivity settings while observing the display output helps optimize performance for target species and water clarity.
- On-Water Performance Validation
Final testing occurs on the water under actual fishing conditions. This real-world evaluation assesses system performance in dynamic environments, including varying depths, water conditions, and kayak movement. Observing sonar readings while paddling and fishing verifies accurate depth and bottom contour representation. Identifying and addressing any remaining issues during this stage ensures optimal performance during actual fishing trips. For example, comparing sonar readings with known underwater structures, such as drop-offs or submerged vegetation, validates the accuracy of the system and confirms correct installation.
Comprehensive testing is integral to a successful fish finder installation. Validating power, connections, transducer functionality, and display operation, culminating in on-water performance evaluation, ensures a reliable and effective system. This meticulous approach maximizes the benefits of the technology, contributing to a more informed and productive fishing experience. By identifying and addressing potential issues early, anglers can confidently rely on their fish finder to enhance their understanding of the underwater environment and ultimately improve their fishing success.
Frequently Asked Questions
This section addresses common queries regarding kayak fish finder installations, providing concise and informative responses to facilitate informed decision-making and successful implementation.
Question 1: What type of fish finder is best suited for kayak fishing?
Fish finder selection depends on individual needs and fishing styles. Compact, portable units with GPS and sonar capabilities are generally preferred for kayaks. Consider factors such as screen size, target species, and water conditions when selecting a model. Chartplotter functionality can be beneficial for navigating unfamiliar waters.
Question 2: Can a fish finder be installed on any type of kayak?
While fish finders can be installed on most kayak types, certain considerations apply. Hull material, available space, and kayak design influence mounting options and transducer placement. Inflatable kayaks may require specialized mounting solutions. Careful planning is essential to ensure compatibility and optimal performance.
Question 3: What is the most effective transducer mounting location for a kayak?
Optimal transducer placement depends on kayak design and fishing conditions. Transom mounting offers convenient installation, while through-hull mounting provides superior performance but requires more invasive installation. Inside-hull mounting is an option for certain kayak types. Consider factors like turbulence and potential interference when choosing a location.
Question 4: How is a kayak fish finder powered?
Kayak fish finders typically operate on 12-volt DC power supplied by a dedicated marine battery. Battery capacity should align with anticipated usage duration. Proper wiring, connectors, and fuse protection are essential for safety and reliable operation. Lithium-ion batteries offer advantages in terms of weight and lifespan but come at a higher cost.
Question 5: What are essential wiring considerations for a kayak fish finder installation?
Employing marine-grade tinned copper wiring and connectors prevents corrosion. Proper wire gauge selection ensures sufficient current delivery. Careful cable routing and securing minimize interference and protect against damage. Thorough waterproofing of connections is crucial for preventing electrical issues.
Question 6: How can one ensure a secure and waterproof installation?
Using marine-grade sealant around all drilled holes and exposed connections prevents water intrusion. Securely fastening components with appropriate hardware and mounting solutions ensures they withstand the stresses of paddling. Regular inspection and maintenance of seals and connections are essential for long-term reliability.
Careful planning, proper installation techniques, and regular maintenance ensure optimal performance and longevity of kayak fish finder systems. Addressing these aspects proactively contributes to a more rewarding and productive fishing experience.
This FAQ section provides foundational knowledge for equipping a kayak with a fish finder. Consulting manufacturer instructions and seeking expert advice when needed further ensures a successful installation tailored to individual needs and kayak configurations.
Installing a Fish Finder on a Kayak
Equipping a kayak with a fish finder represents a significant upgrade for anglers. This comprehensive guide has explored the crucial aspects of this process, from planning and component selection to mounting, wiring, power management, and testing. Strategic placement of the transducer, display unit, and battery ensures optimal performance and user experience. Meticulous wiring practices, using marine-grade materials and proper routing techniques, guarantee reliable operation and longevity. Careful attention to power requirements, including battery selection and circuit protection, ensures consistent functionality. Thorough testing and calibration validate system integrity and maximize effectiveness on the water.
Successful fish finder installation empowers anglers with enhanced underwater awareness, leading to more strategic fishing decisions and increased success. This technology opens up new possibilities for exploring underwater terrain, locating fish-holding structures, and ultimately, improving angling prowess. While this guide provides a solid foundation, continuous learning and adaptation to specific fishing environments further refine skills and maximize the benefits of this valuable tool. Embracing this technology enhances the kayak fishing experience, fostering a deeper connection with the aquatic environment and promoting responsible angling practices.


